OSIsoft PI Data Import
Pro This data connector is only available in Visplore Professional.
To import data from the OSIsoft PI System, choose the option "PI System" when starting a data import:
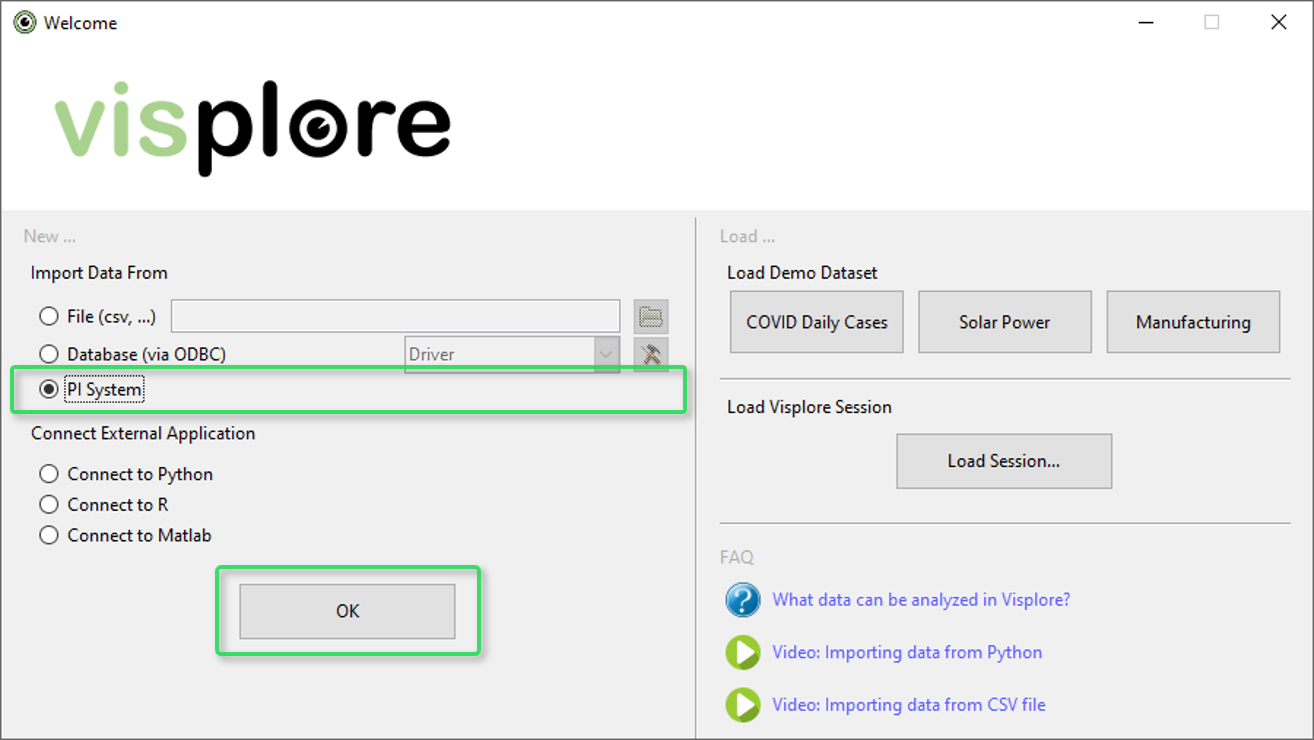
After clicking on "OK" (and entering a user name and password, if required), the import dialog is shown:
 |
|
Time Interval
Here you can select a relative or absolute time period in which the data should be queried:
Absolute Time Interval
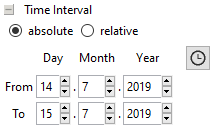
Relative Time Interval

Relative specifications additionally allow automatic updates of the data, so that in regular intervals, new data is loaded dynamically. Set Auto Update to in regular intervals, and specify an update frequency.
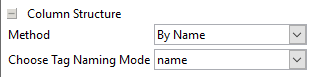
Column Structure
In the Method dropdown-menu, choose whether you would like to search for tags by name, or by asset structure.
In Choose Tag Naming mode, select a scheme by which tags are named in Visplore: by tag name, by tag description, or by both.
Row Definition
These options allow you to choose between importing data rows in a regular raster or based on specific events:
Regular Raster
When choosing this option, a data row for each interval (e.g. for each second) is created for the specified time interval. The values of imported tags are interpolated if no data point lies at a specific time point.

Event
Allows you to specify a "trigger" tag, which is used to specify the rows of the imported data table. As trigger event, you can choose between "On Value Change" (= a data row is created each time the value of the trigger tag changes) or "On Value Occurred" (= a data row is created each time a specific value occurs in the trigger tag).

Search "By Name"
When searching tags by name (if set in the "Column Structure"), the following dialog is shown:
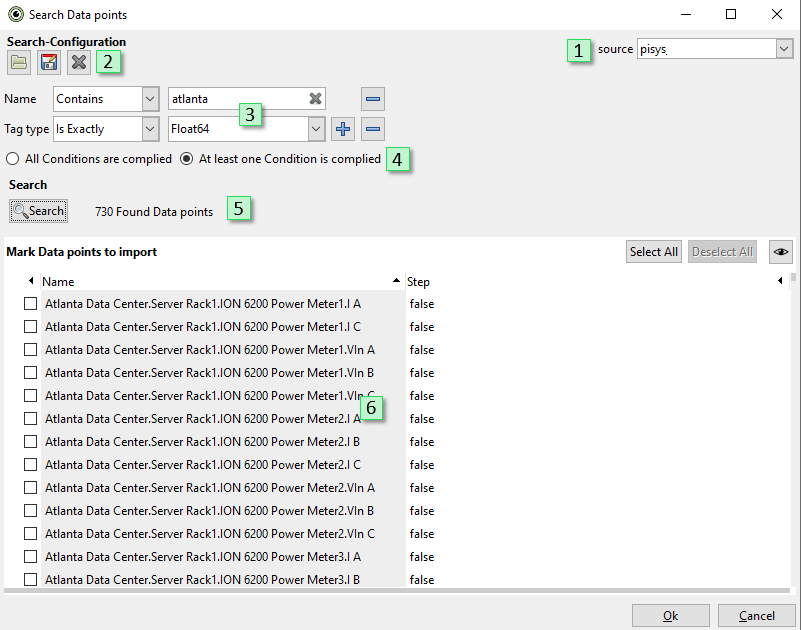
- Selection of an available PI Web API Server. The available servers must be pre-configured in the Visplore installation.
- Loading, saving and clearing the current search configuration (3 and 4).
- The search conditions. As in the image above, for example, you can search for tags containing a specific substring, or for tags having a certain type. Add additional conditions with "+", and remove them again with "-".
- Choose to whether all search conditions must be complied, or at least one.
- Start the search based on the current conditions with the button on the left.
- The currently found list.
Right-clicking the current list or clicking on the button with the eye-symbol allows you to add additional information of the tags as columns in the list (e.g. the tag type, unit or description).
After tags have been found based on the specified search conditions, mark the tags you would like to add to your import by selecting them using the checkboxes on the left or by clicking on "Select All". When confirming the dialog with "OK", the selected tags are added to the current tag list of the import.
Search "By Asset Structure"
When searching tags by asset structure (if set in the "Column Structure"), the following dialog is shown:
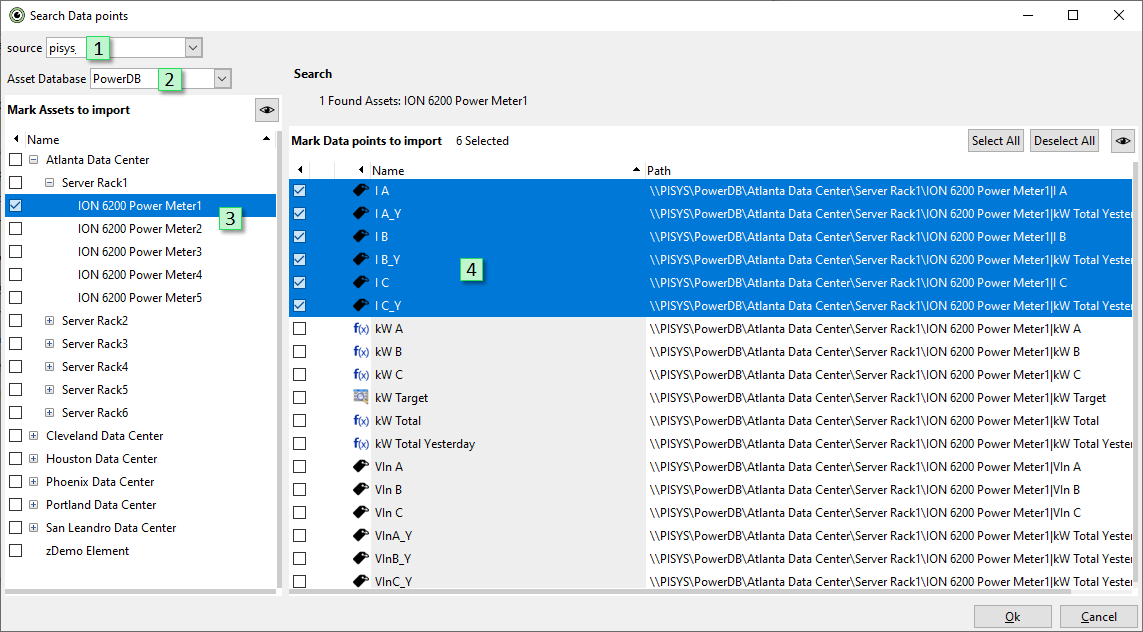
- Selection of the Asset Server.
- Selection of the Asset Database.
- Browse the assets. When clicking on a "+", the child elements of the asset are displayed. Selecting an asset with a checkbox displays the contained data points in the list on the right (5).
- List and selection of the data points to be imported.
Right-clicking the current list or clicking on the button with the eye-symbol allows you to add additional information of the tags as columns in the list (e.g. the tag type, unit or description).
Mark the tags you would like to add to your import in the table on the right (5) using the checkboxes or via "Select All". When confirming the dialog with "OK", the selected tags are added to the current tag list of the import.
Loading and Saving Tag Lists
After you have composed a list you would like to import, it is possible to save the list for later uses. The list can be saved and restored in two ways:
... to / from a file
By clicking on the save button above the list, or by pressing "Ctrl" + "S", the current tag list can be saved to a textfile and restored at a later time using the load button:
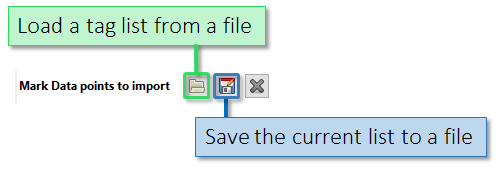
When saving a list to a file, the saved text documents simply contains one tag per row of the document:

... to / from the clipboard
If you press "Ctrl" + "C" while the import dialog is open, the tags will be saved to the clipboard in the same format as above.
If you press the key combination "Ctrl" + "V" while the import dialog is open, the tags that were copied to the clipboard will be loaded into the import dialog.