Monitor conditions
With Visplore's Automation Server, setting up condition-based automated email reports is quick and straightforward.
As a first step, configure the views you'd like to include in the scheduled reports. In this example, we want to receive an email whenever the characteristics of a valve enter a performance loss region, so that engineers can take the necessary maintenance actions.
Use the lasso selection mode to select the normal operation regions in the Scatter Plot, then invert the selection using the workflow widget.

With the selection active in the Focus, click the "Create email" button in the top bar, then select "Create condition email" from the dropdown menu.

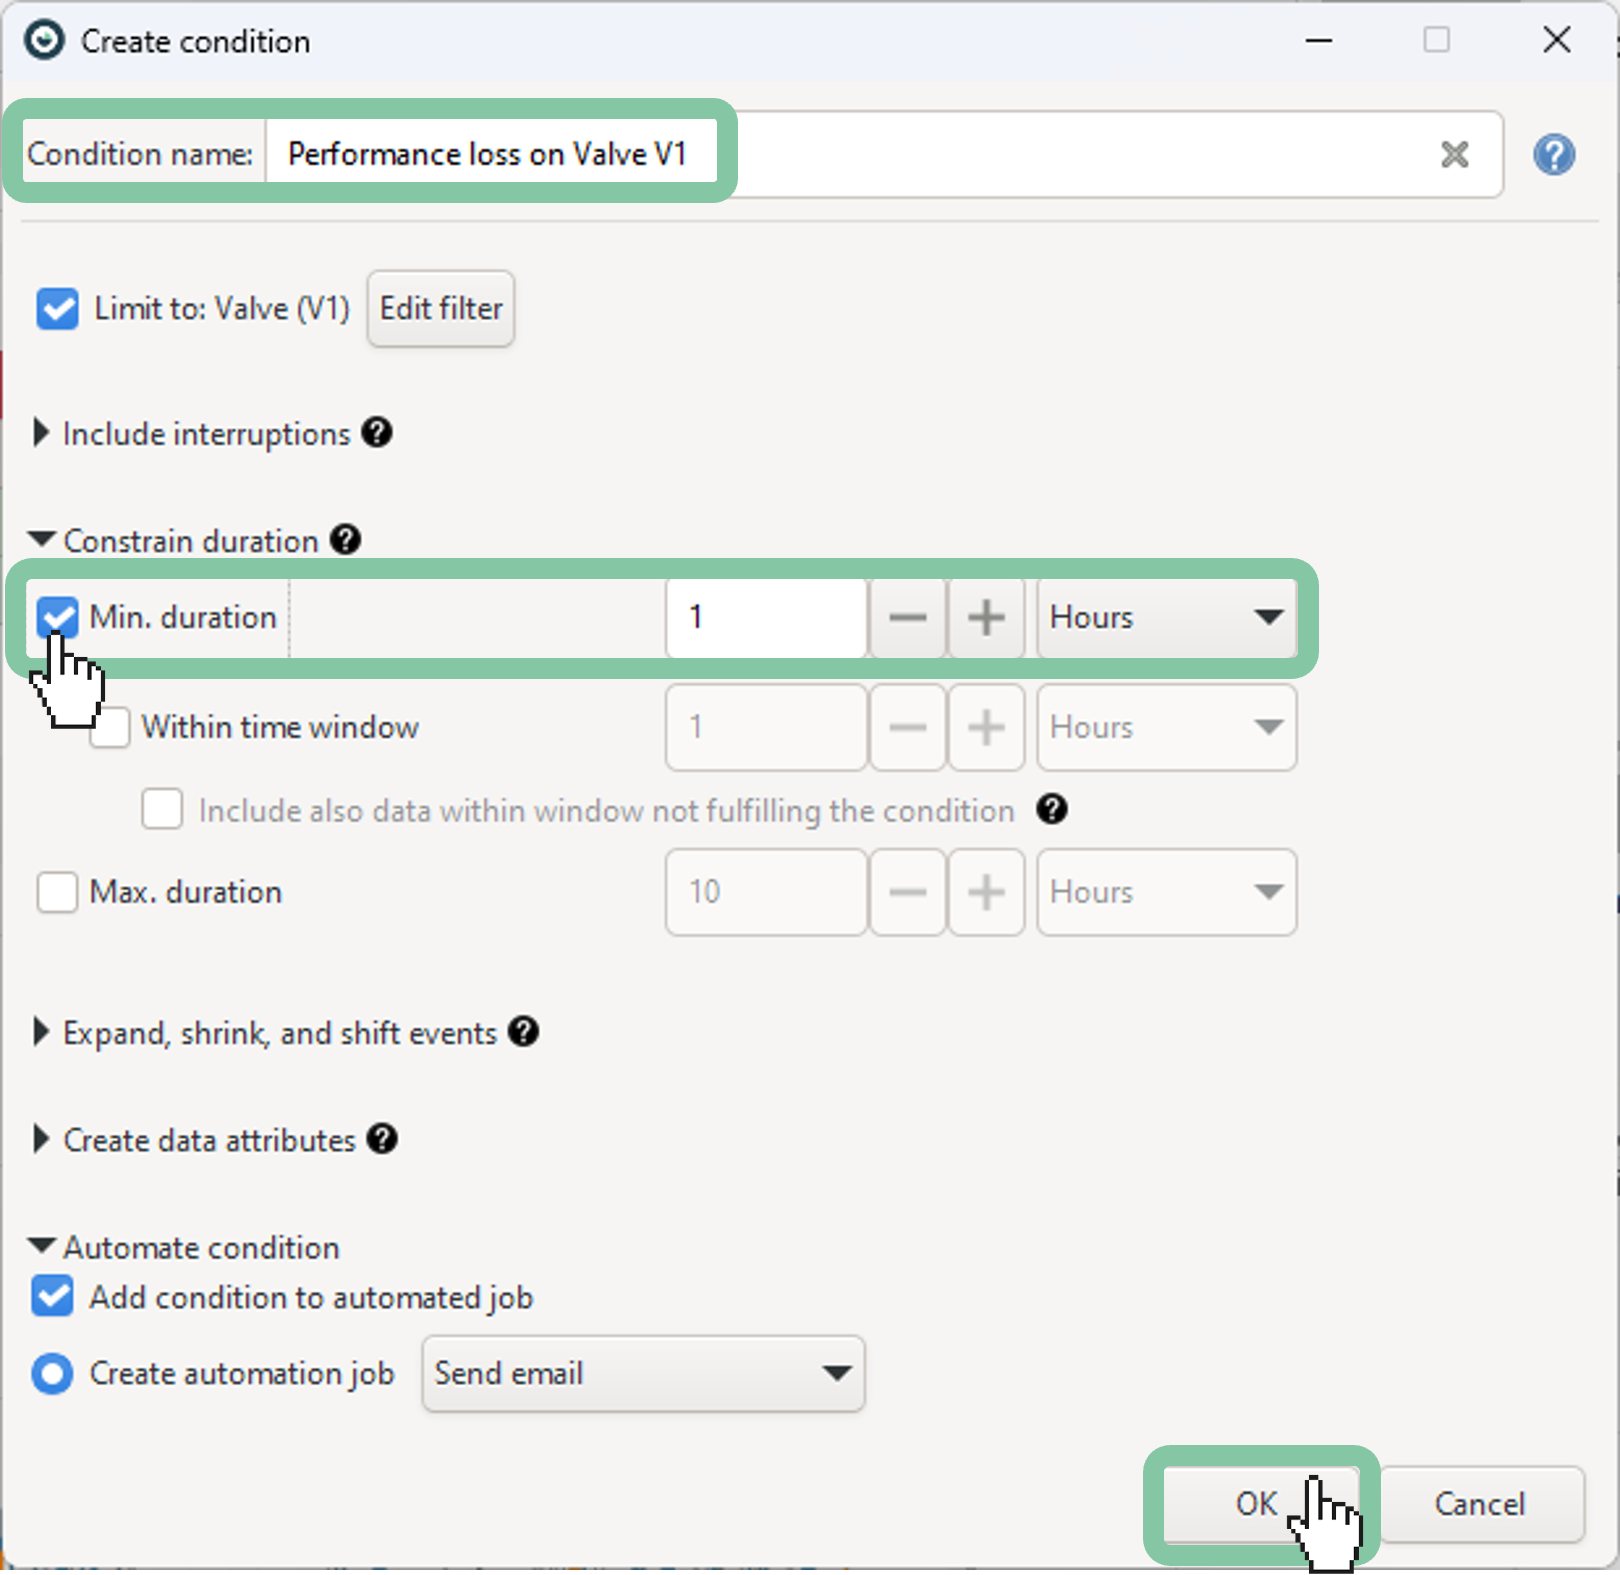
Give the condition a descriptive name and set a minimum duration threshold. This ensures that engineers are not notified in cases of brief or minor tolerance violations.
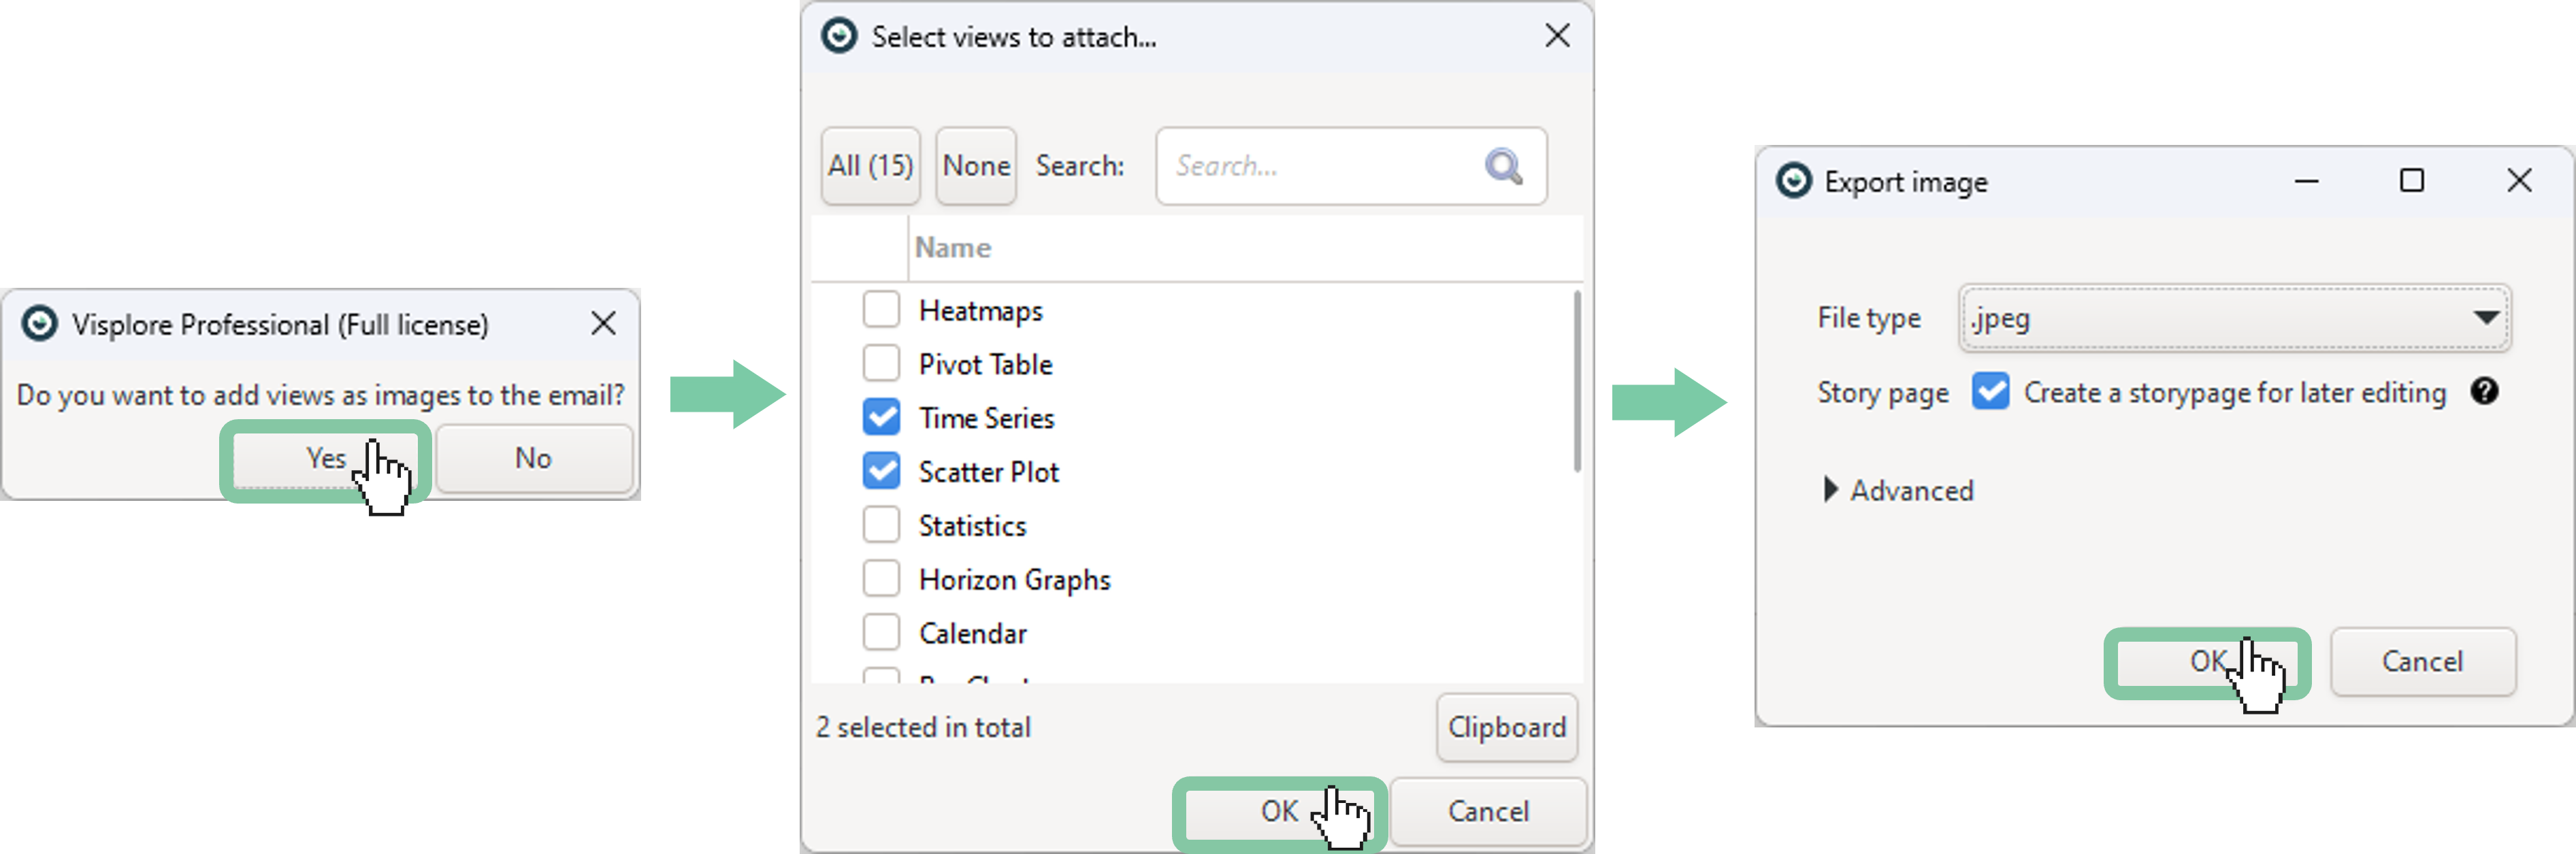
In the dialog that appears, select Yes.
Choose the views you want to embed in the email.
Select the desired file type. If you’d like to edit the images later, you can also create a story page for them.
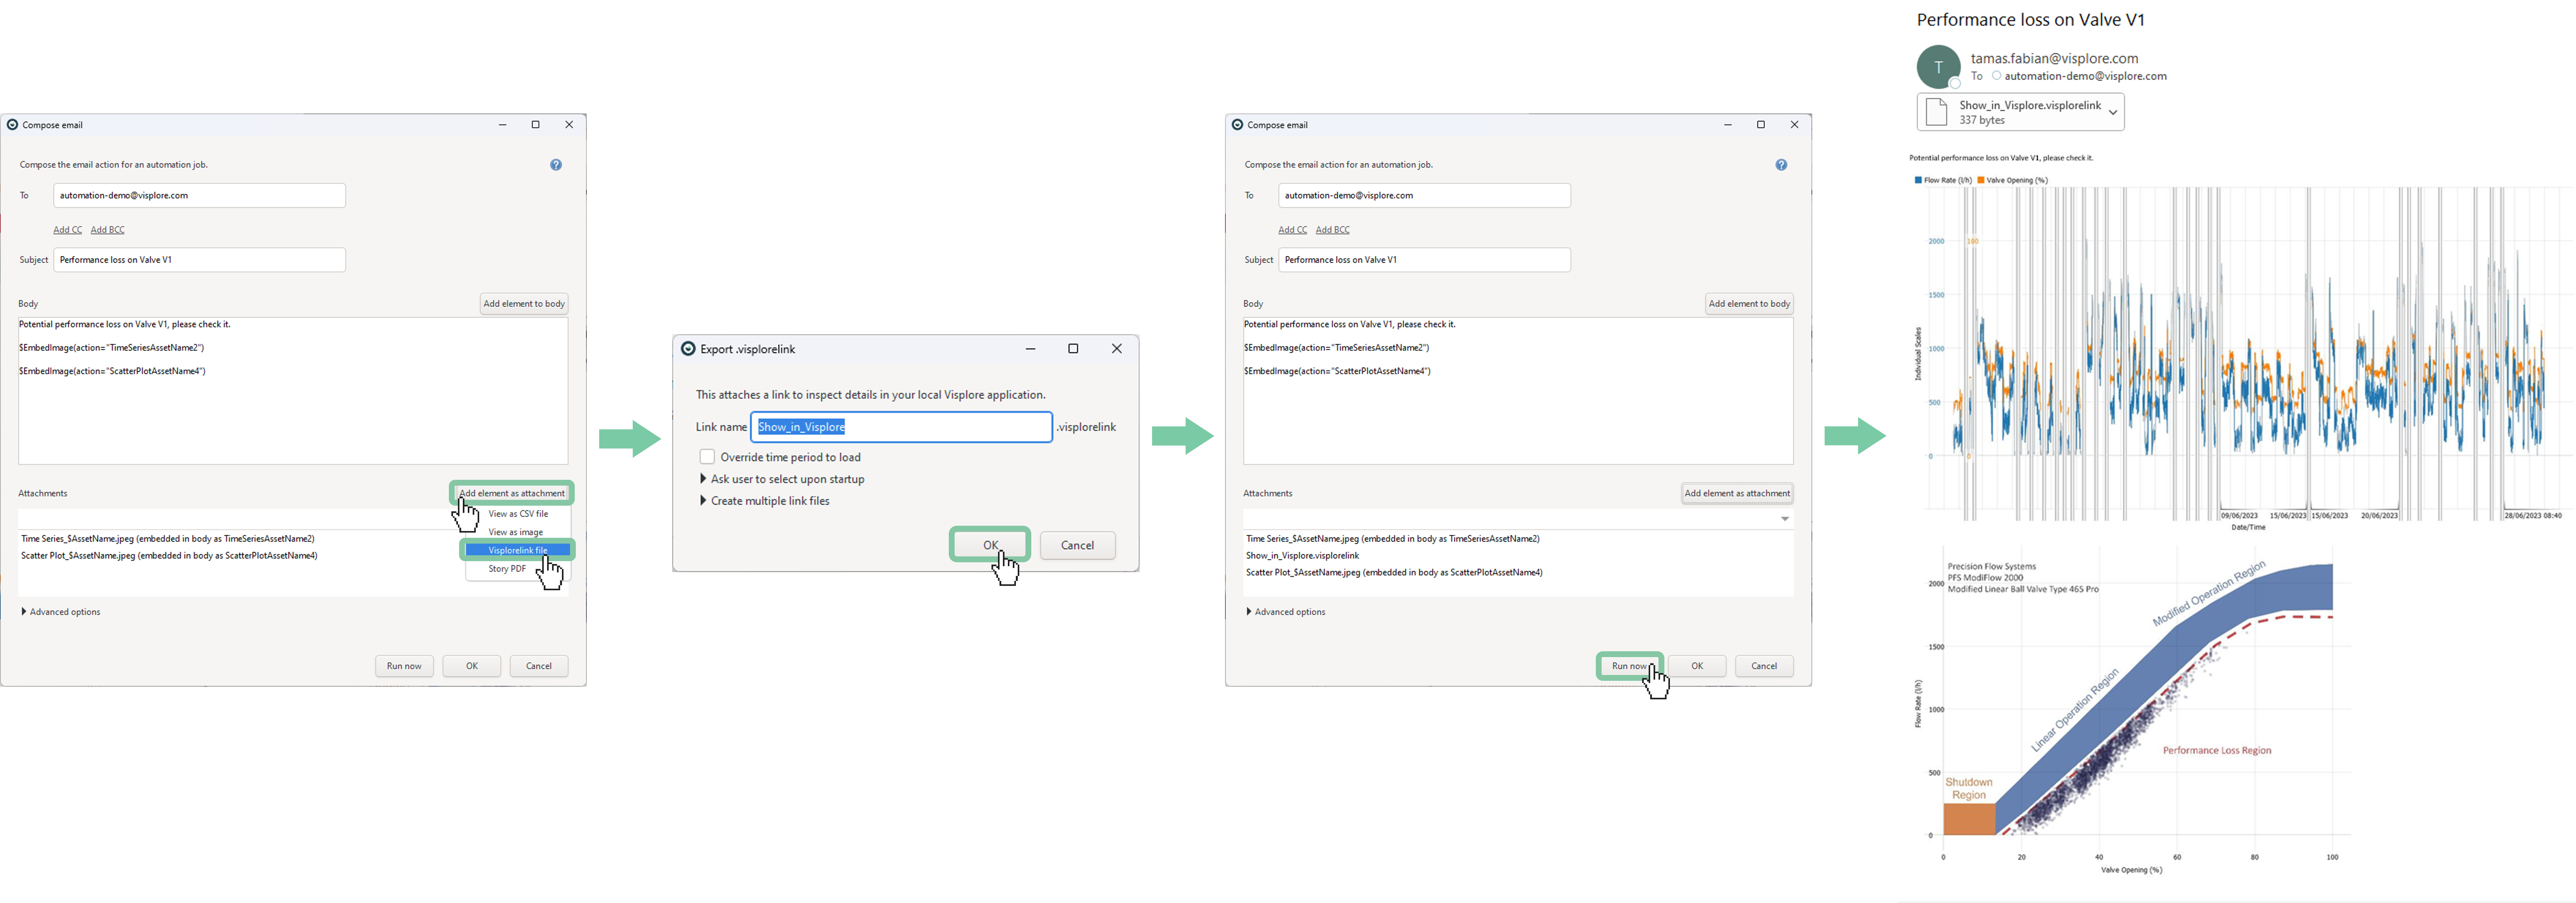
Fill in the remaining email fields, such as "To", "CC", and extend the email body if necessary to provide additional context. To support a more detailed investigation, attach a .visplorelink file to the email. This allows engineers to open the relevant analysis session directly. Use the "Run now" button to send a test email and verify the configuration. If the sender mailbox settings are not yet configured, please refer to the documentation page for guidance on setting up the email dialog.
If the email looks good, click OK and create a schedule for the action.
Choose your preferred schedule interval, then click OK.

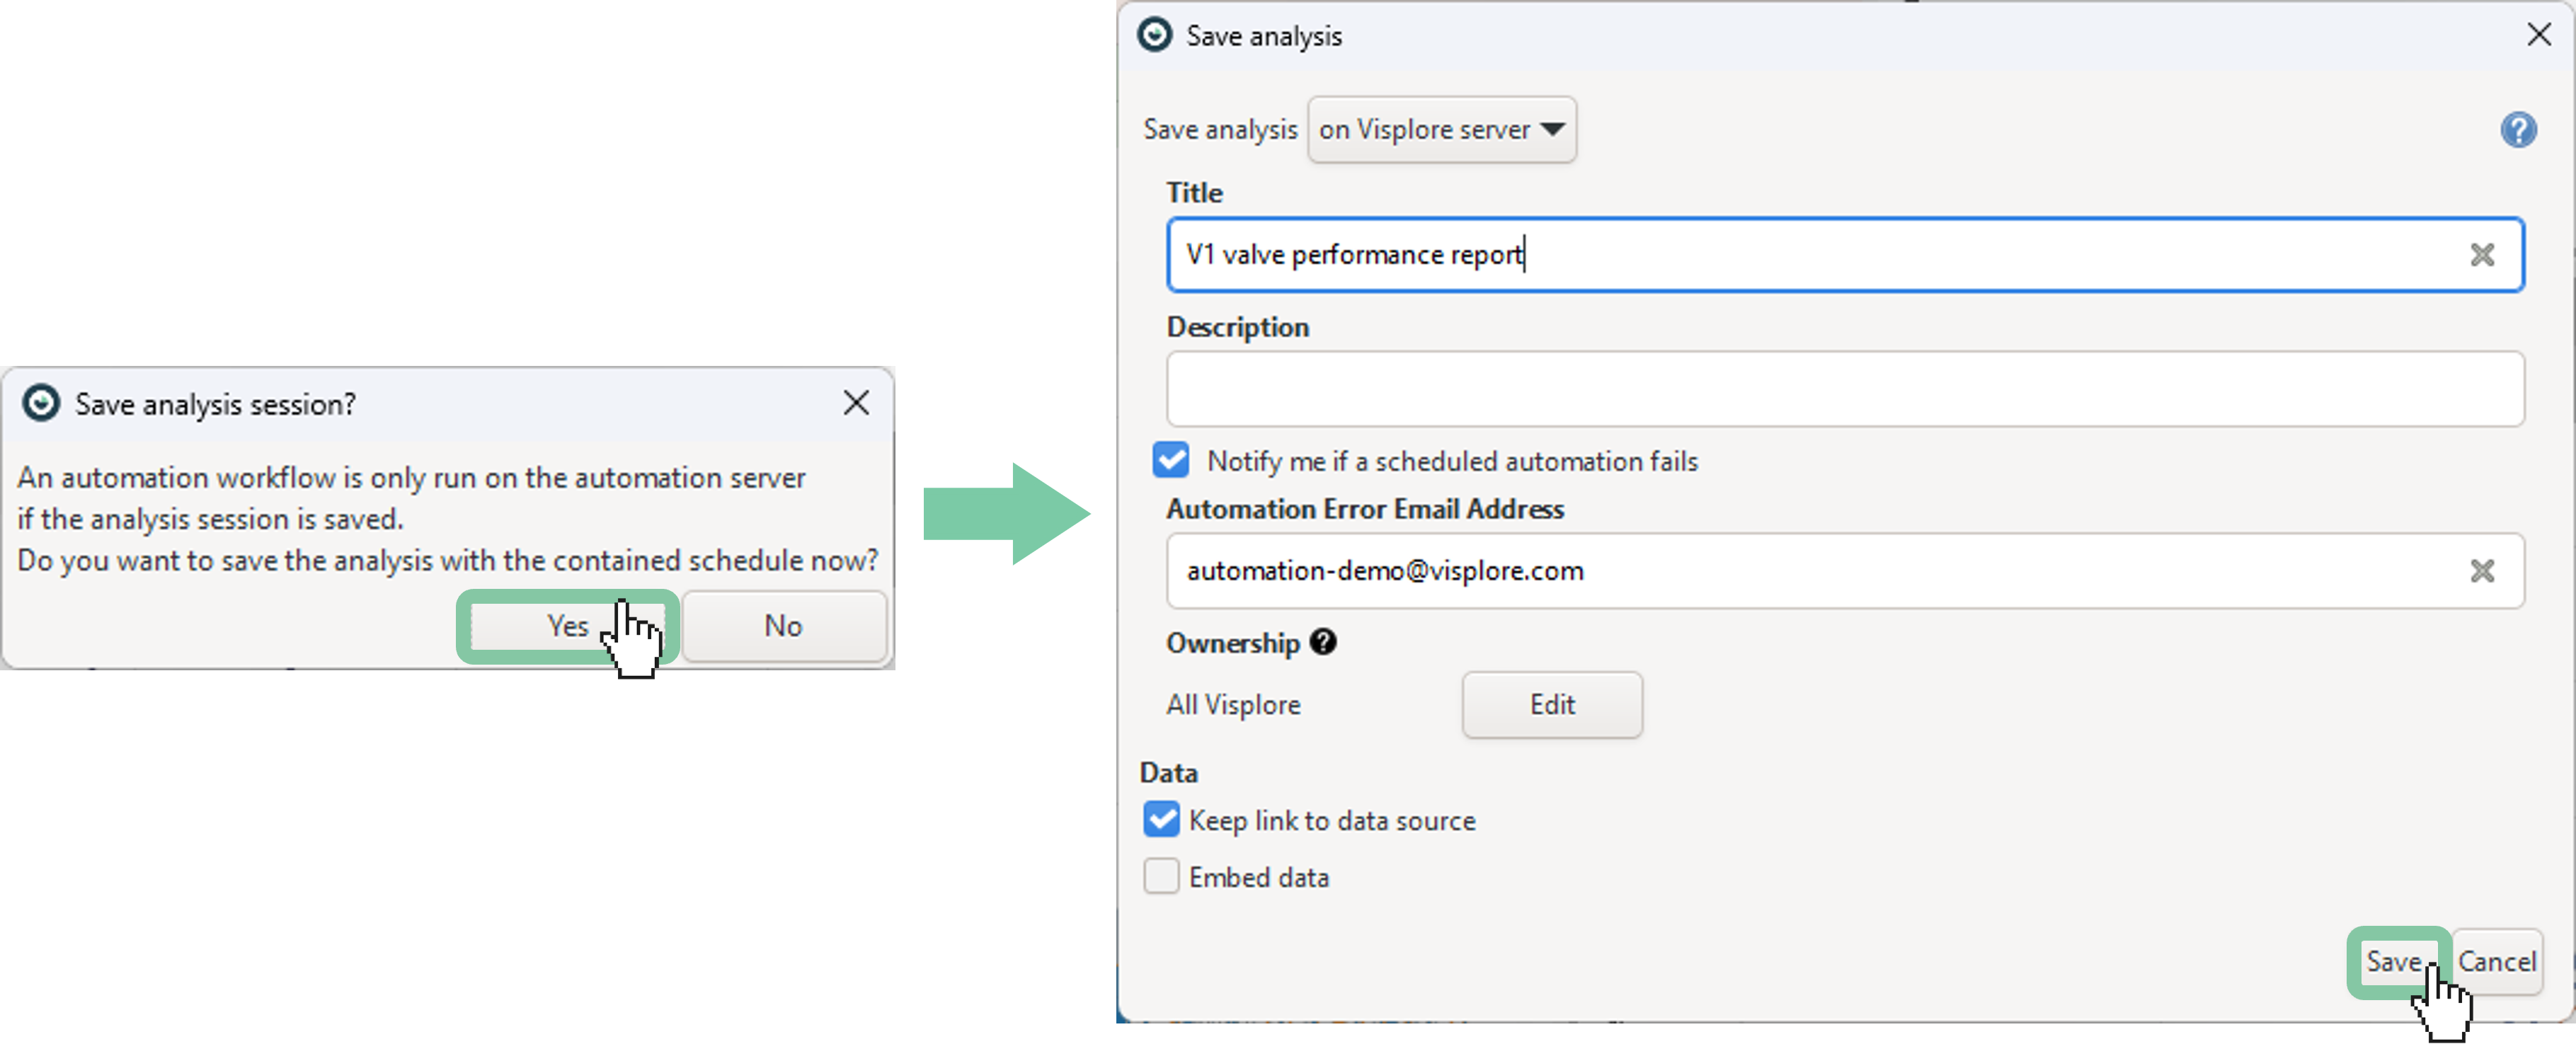
Save the analysis session to the server.
Well done! You've successfully mastered the basics of setting up a condition-based email action in Visplore.