Setting up automated email reports
With Visplore's Automation Server, setting up automated email reports is quick and straightforward.
As a first step, configure the views you'd like to include in the scheduled reports. In this example, we want to receive an email showing the time series of Flow rate and Valve opening, as well as the relationship between them over time.
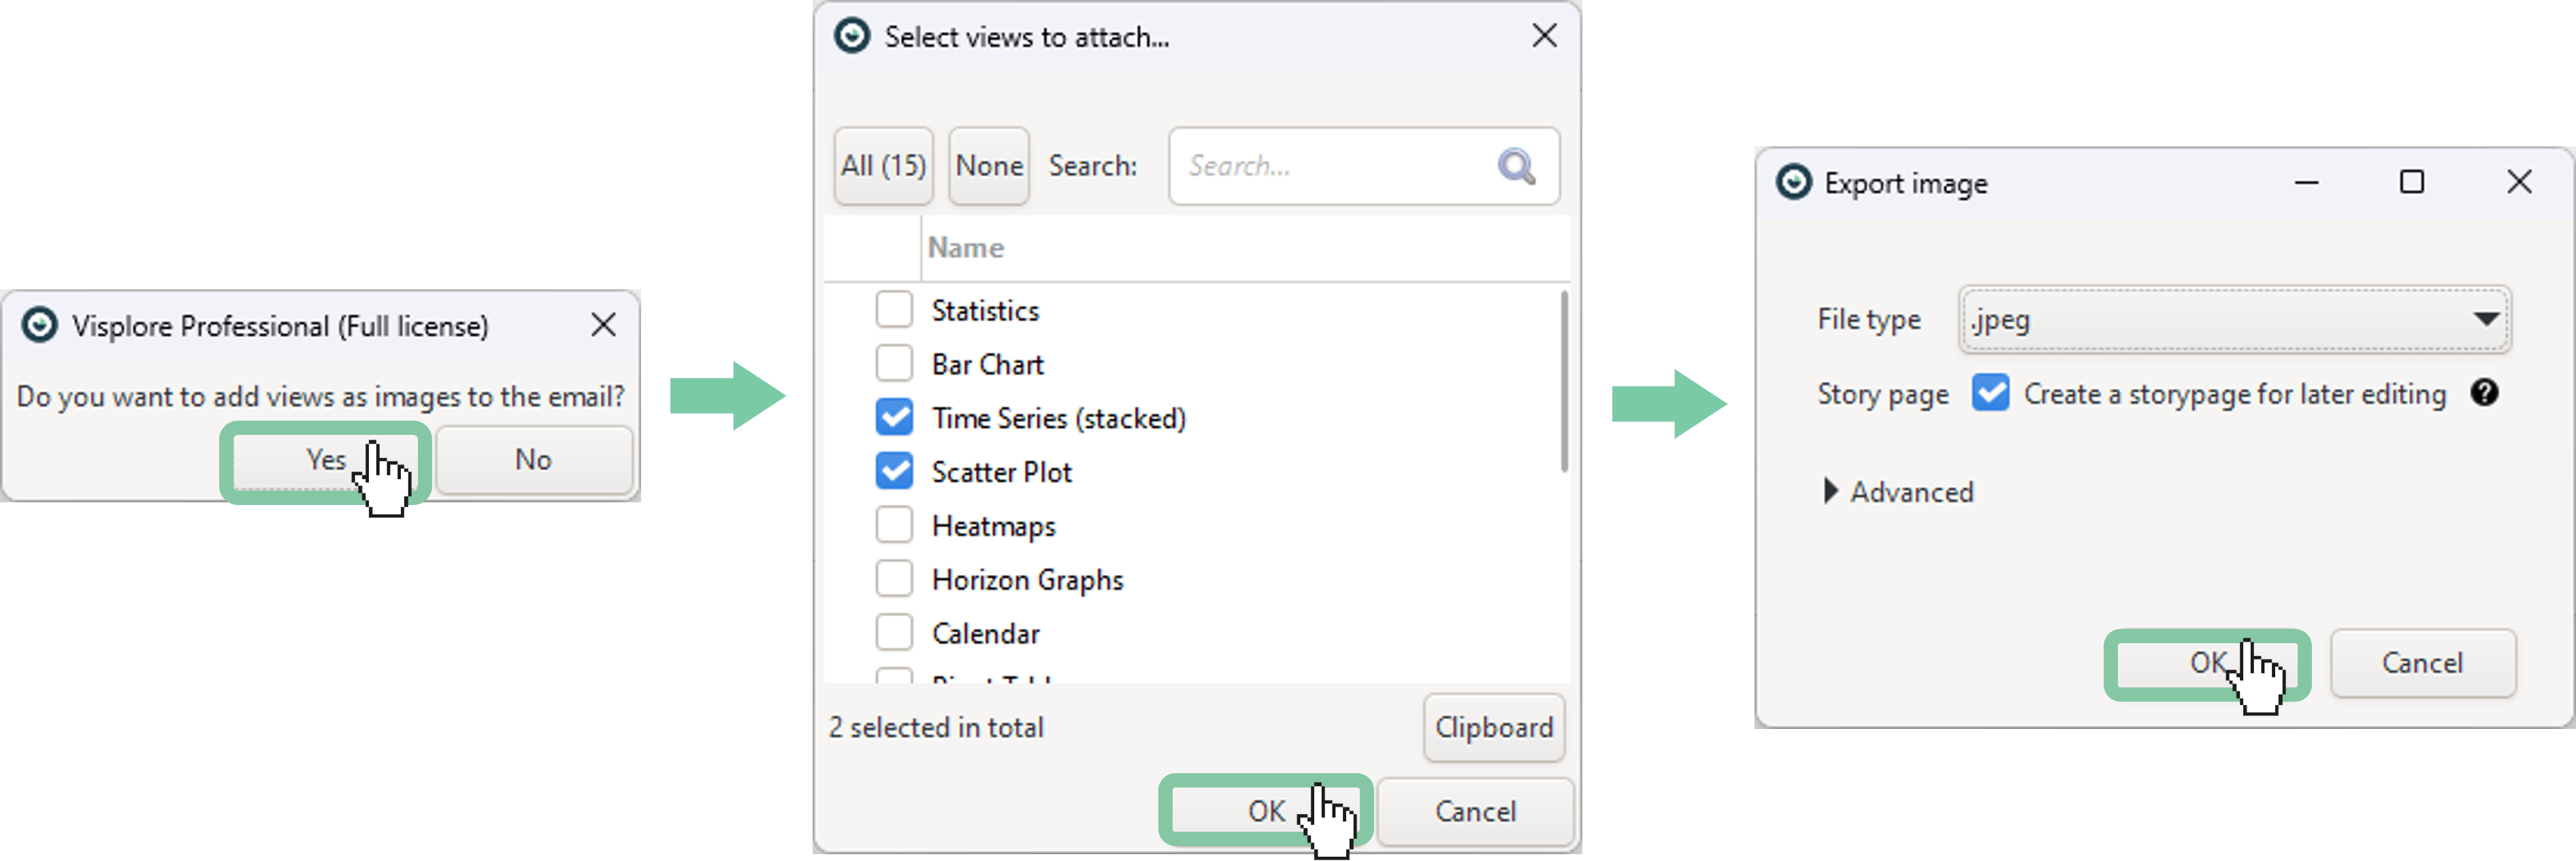
Click the "create email button" in the top bar to start creating an unconditional email.

In the dialog that appears, select Yes.
Choose the views you want to embed in the email.
Select the desired file type. If you’d like to edit the images later, you can also create a story page for them.
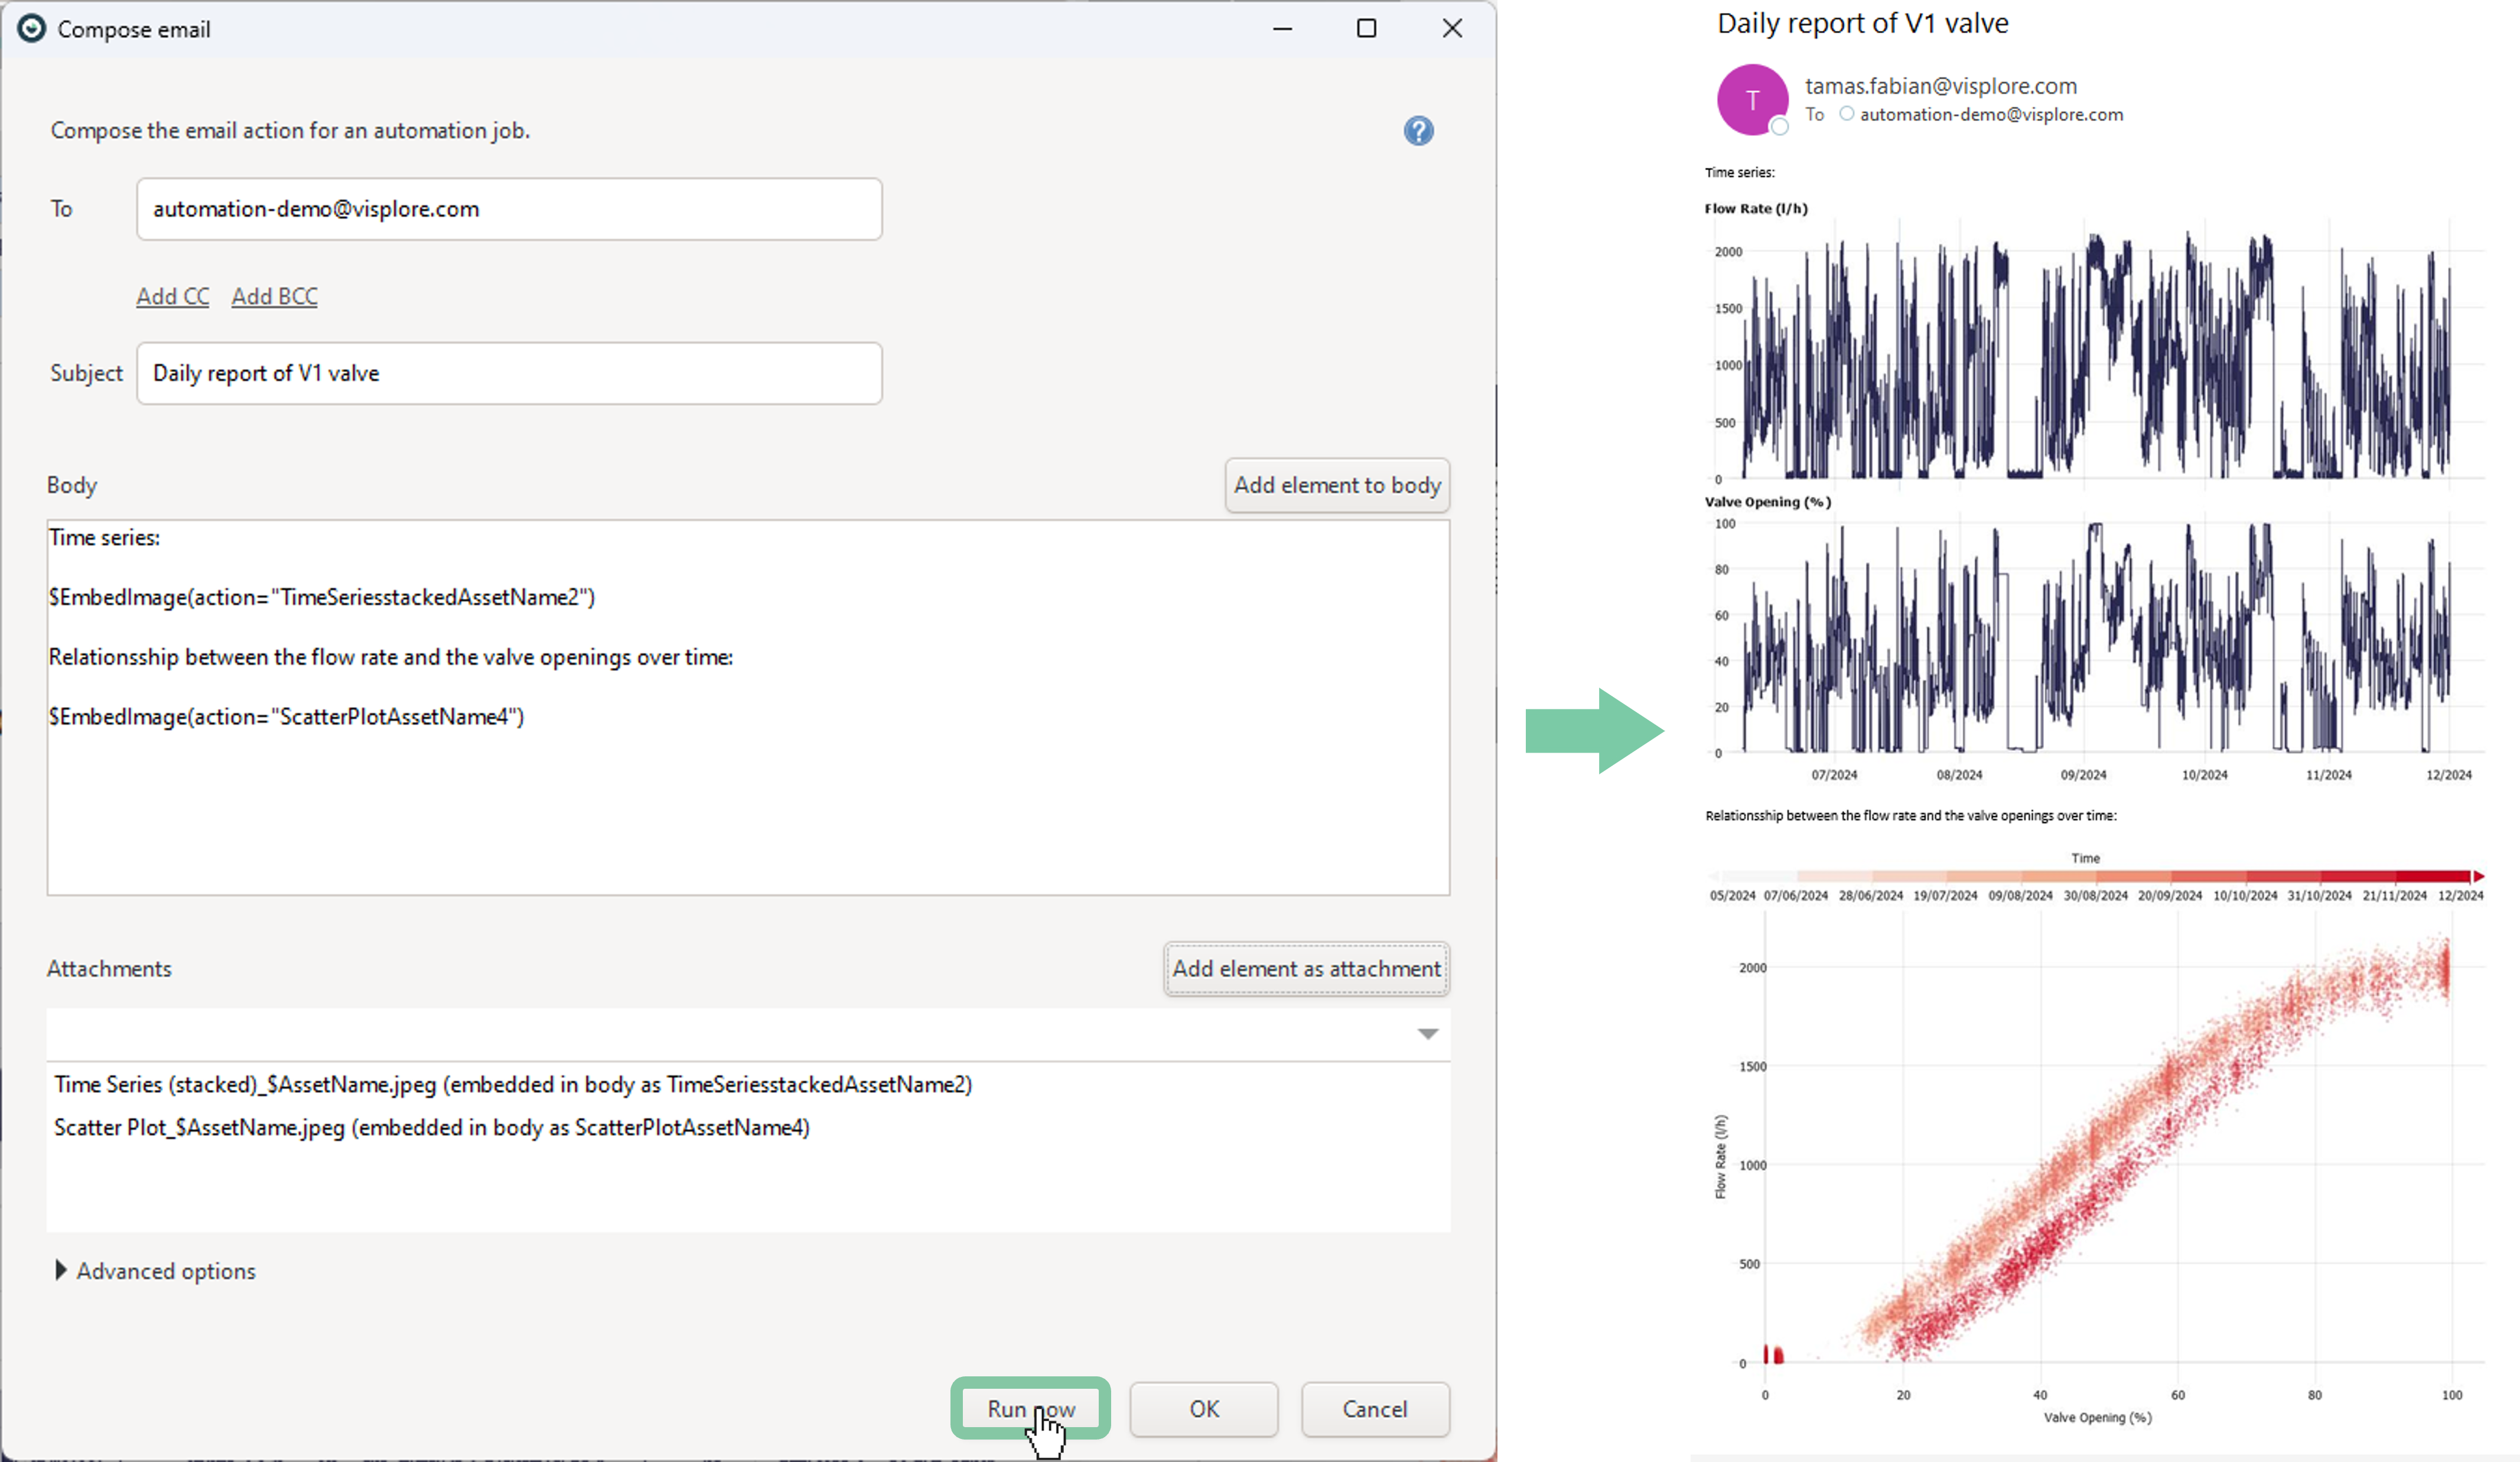
Fill in the remaining email fields such as "To", "CC" and "Subject". You can also extend the email body if needed. Additionally, it's possible to add more elements to the email, such as a story PDF, CSV file, etc. Use the "Run now" button to send a test email and verify the configuration. If the sender mailbox settings are not yet configured, please refer to the documentation page for guidance on setting up the email dialog.
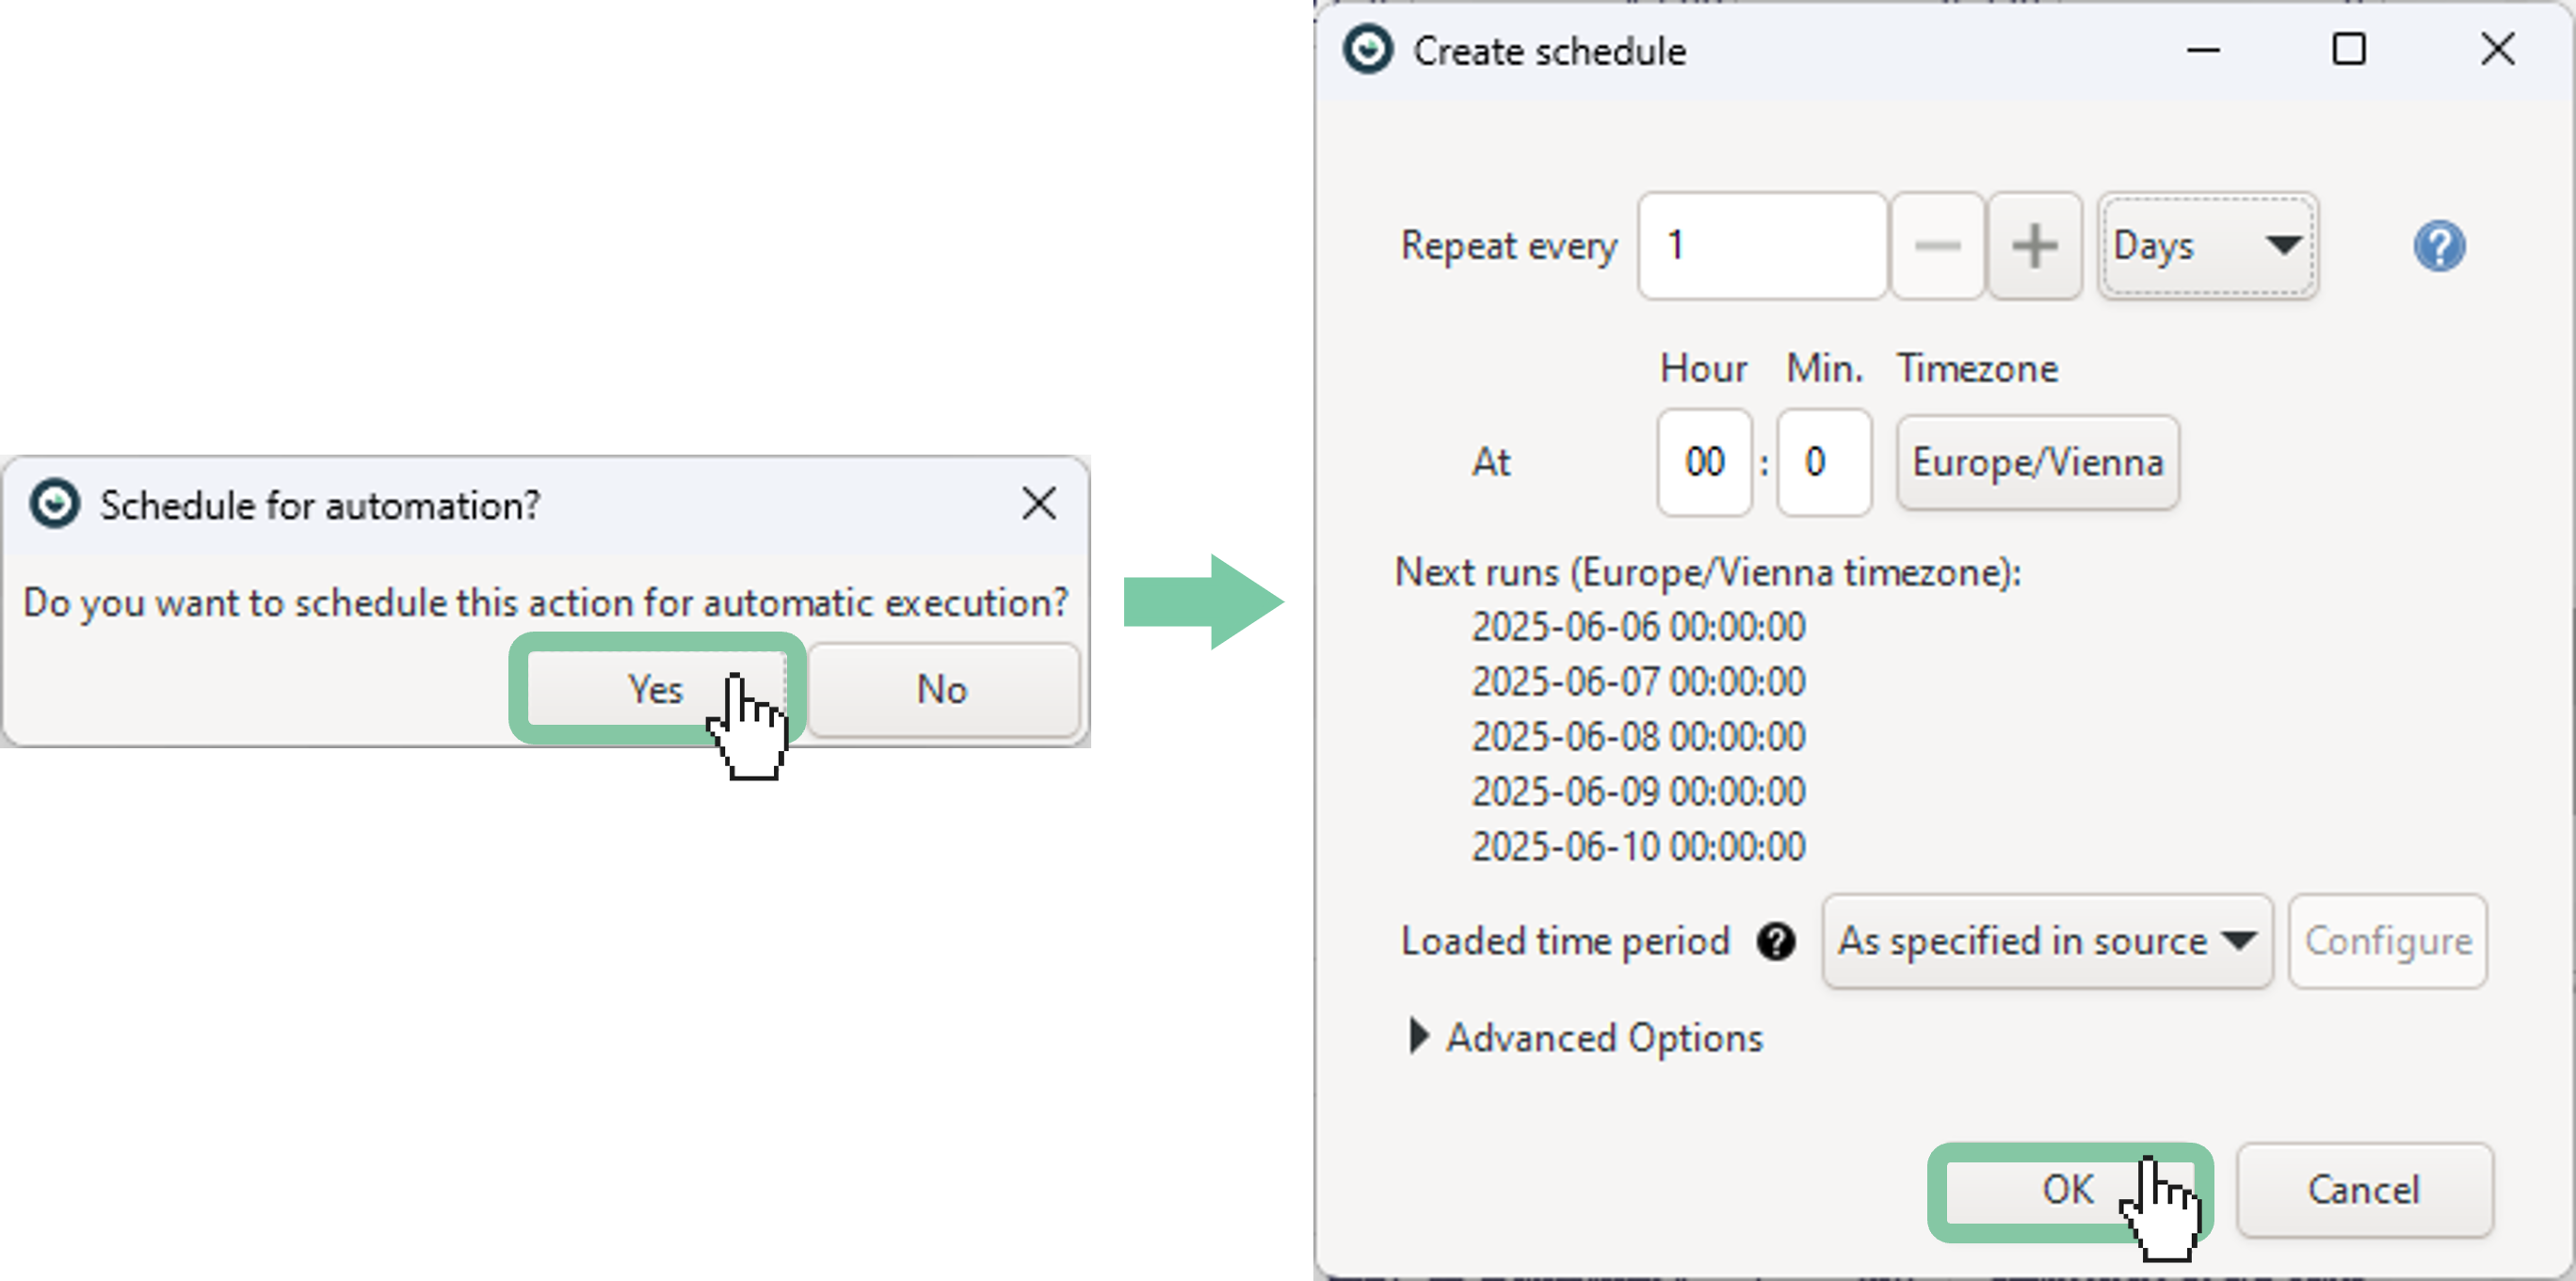
If the email looks good, click OK and create a schedule for the action.
Choose your preferred schedule interval, then click OK.
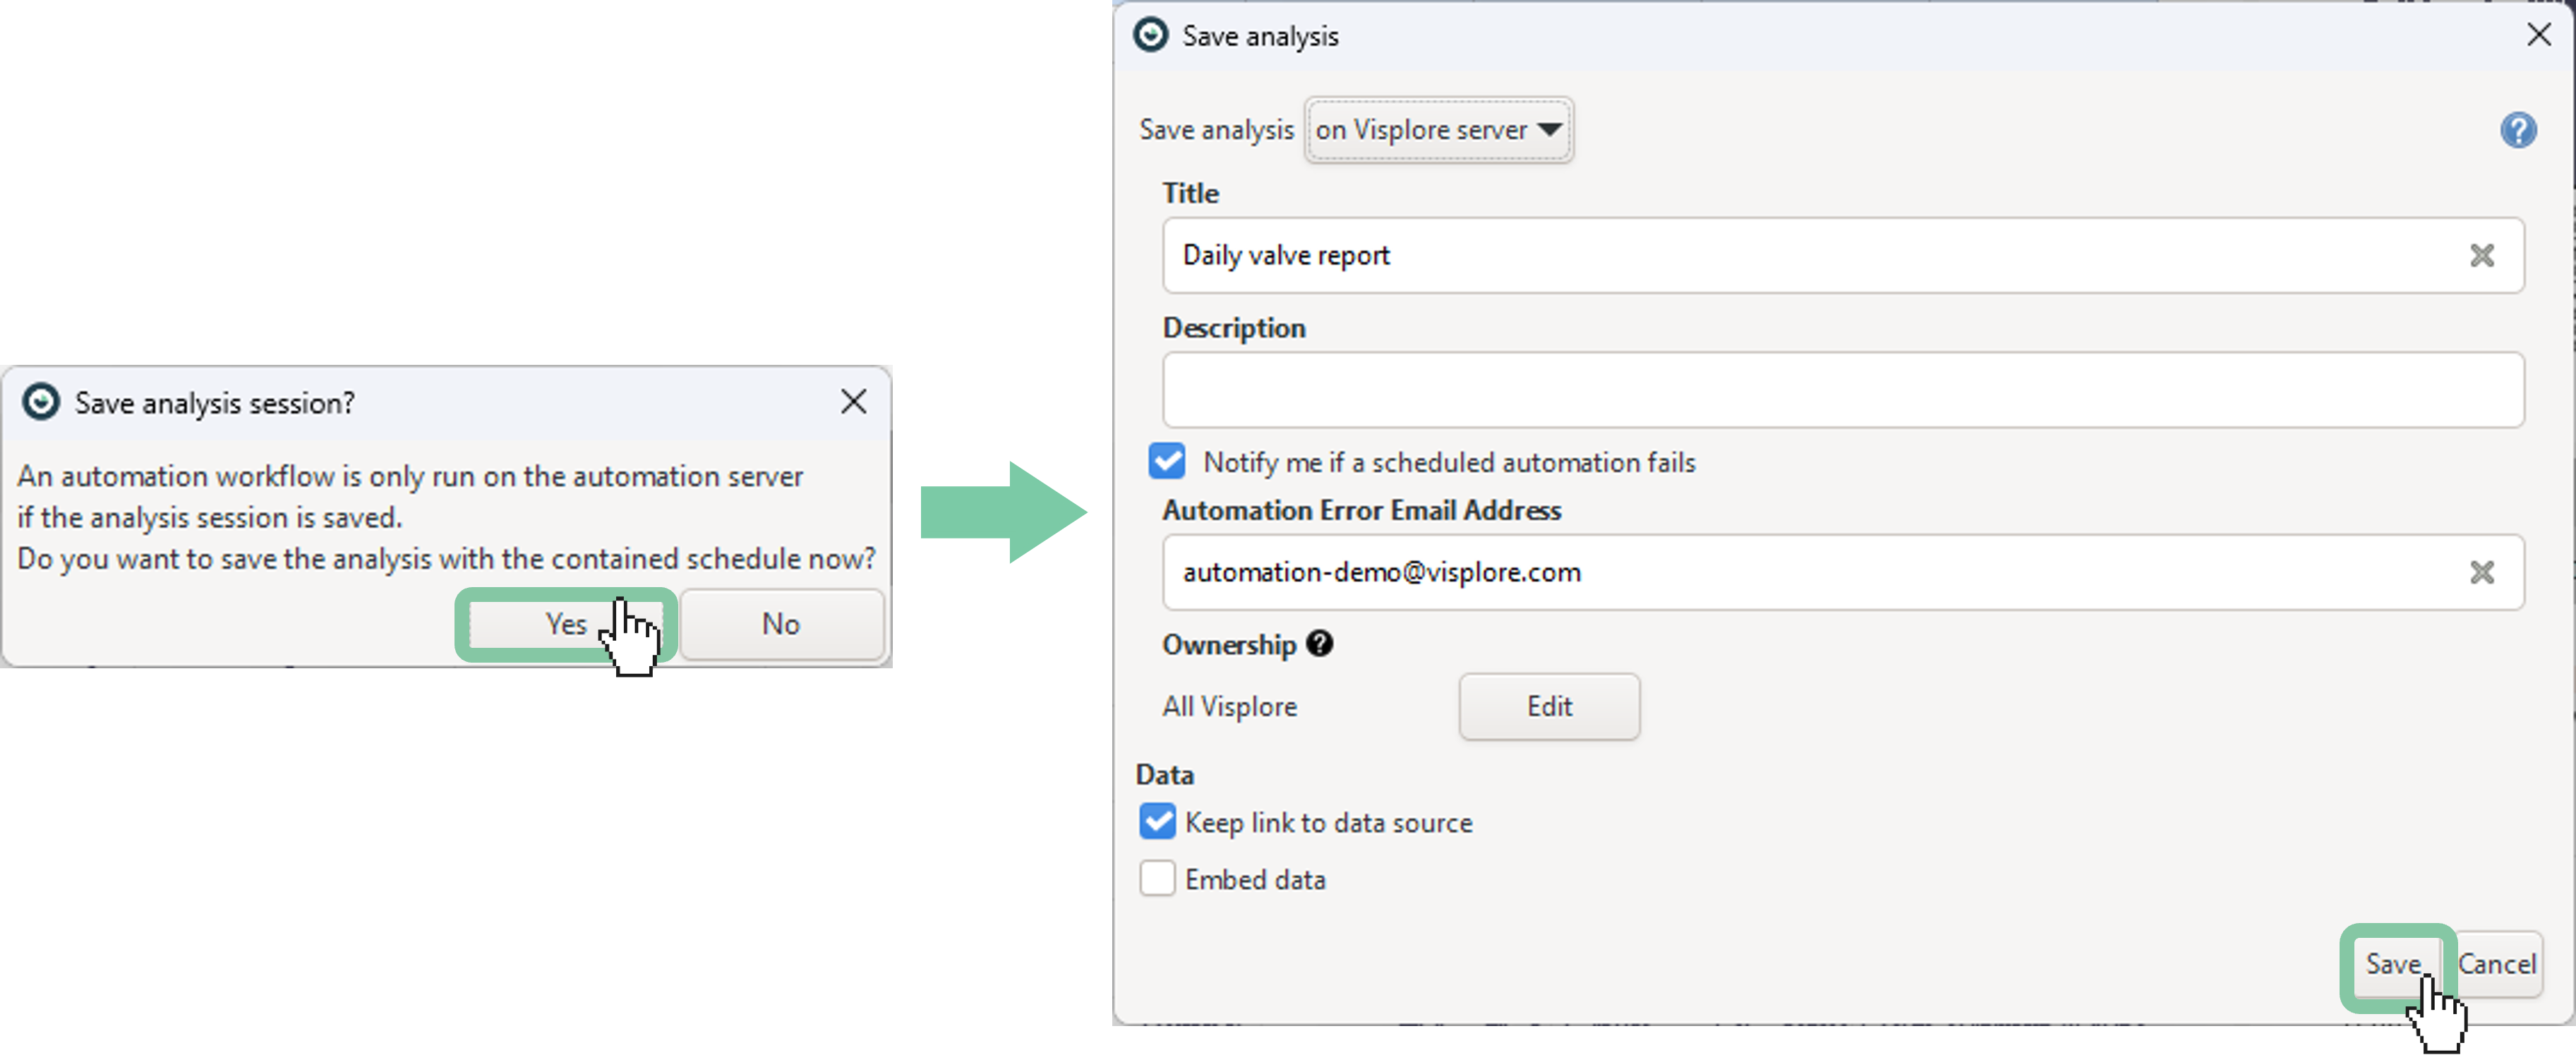
Save the analysis session to the server.
Note: if you’d like to receive an email only when a specific condition is met, please refer to the Monitor Conditions page.
Note: this workflow can also be used to export your macros, even without the Automation Server.
Well done! You've successfully mastered the basics of setting up an email action in Visplore.