InfluxDB (2.x) Data Import
Pro This data connector is only available in Visplore Professional.
Visplore can connect to InfluxDB 2.x databases via a custom Python importer utilizing the Flux query language.

Setting up the initial InfluxDB connection
Setting up a connection to an InfluxDB database in Visplore is easy. Start Visplore and select “InfluxDB Python Importer” in the welcome dialog.
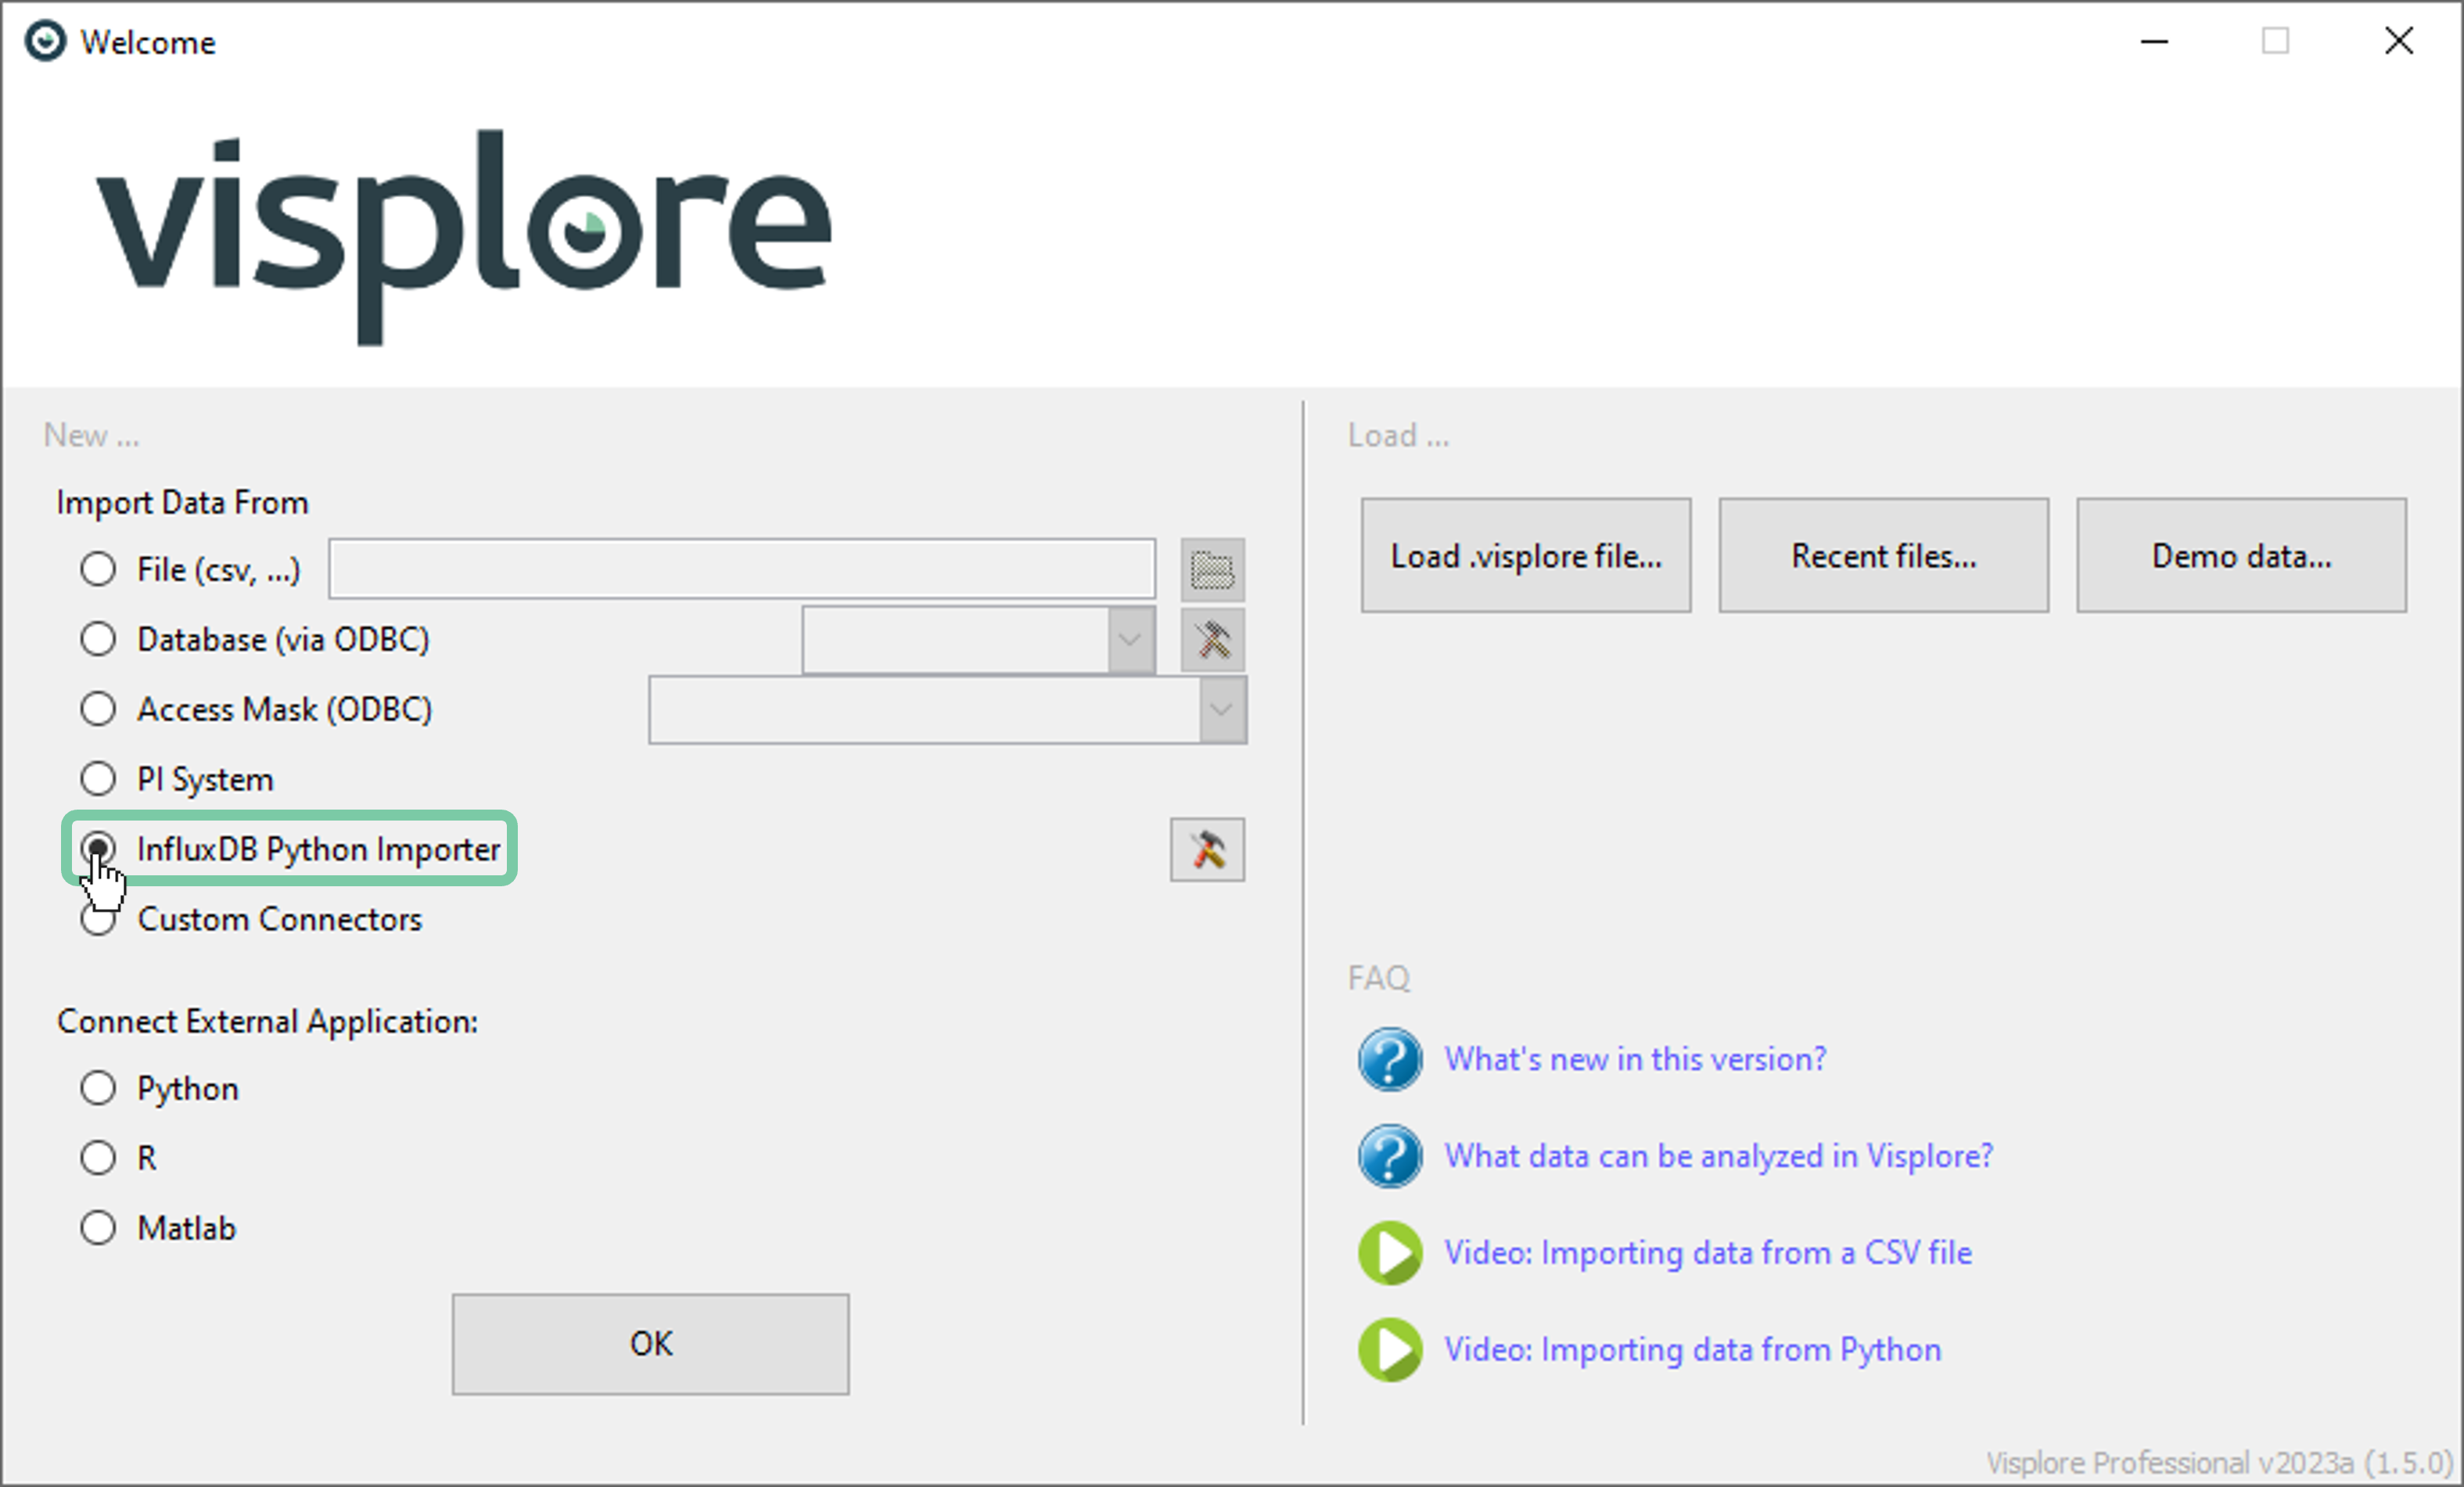
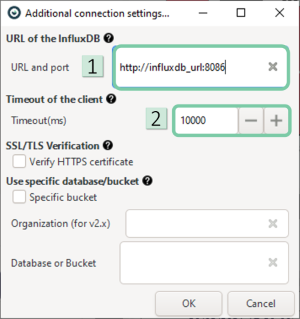
If this is the first time that this option is selected, then you’ll be asked to specify the connection settings
- 1. Enter the URL and the port info. The format is: http://
: Note that 8086 is the most common port. - 2. Enter the duration in milliseconds that the query has to be aborted and an error is returned. This is set to 10000 by default.
Configuring and filtering the import
After setting up the connection, data import window will pop up as shown below. You can configure the import parameters as you wish using the explanations provided.
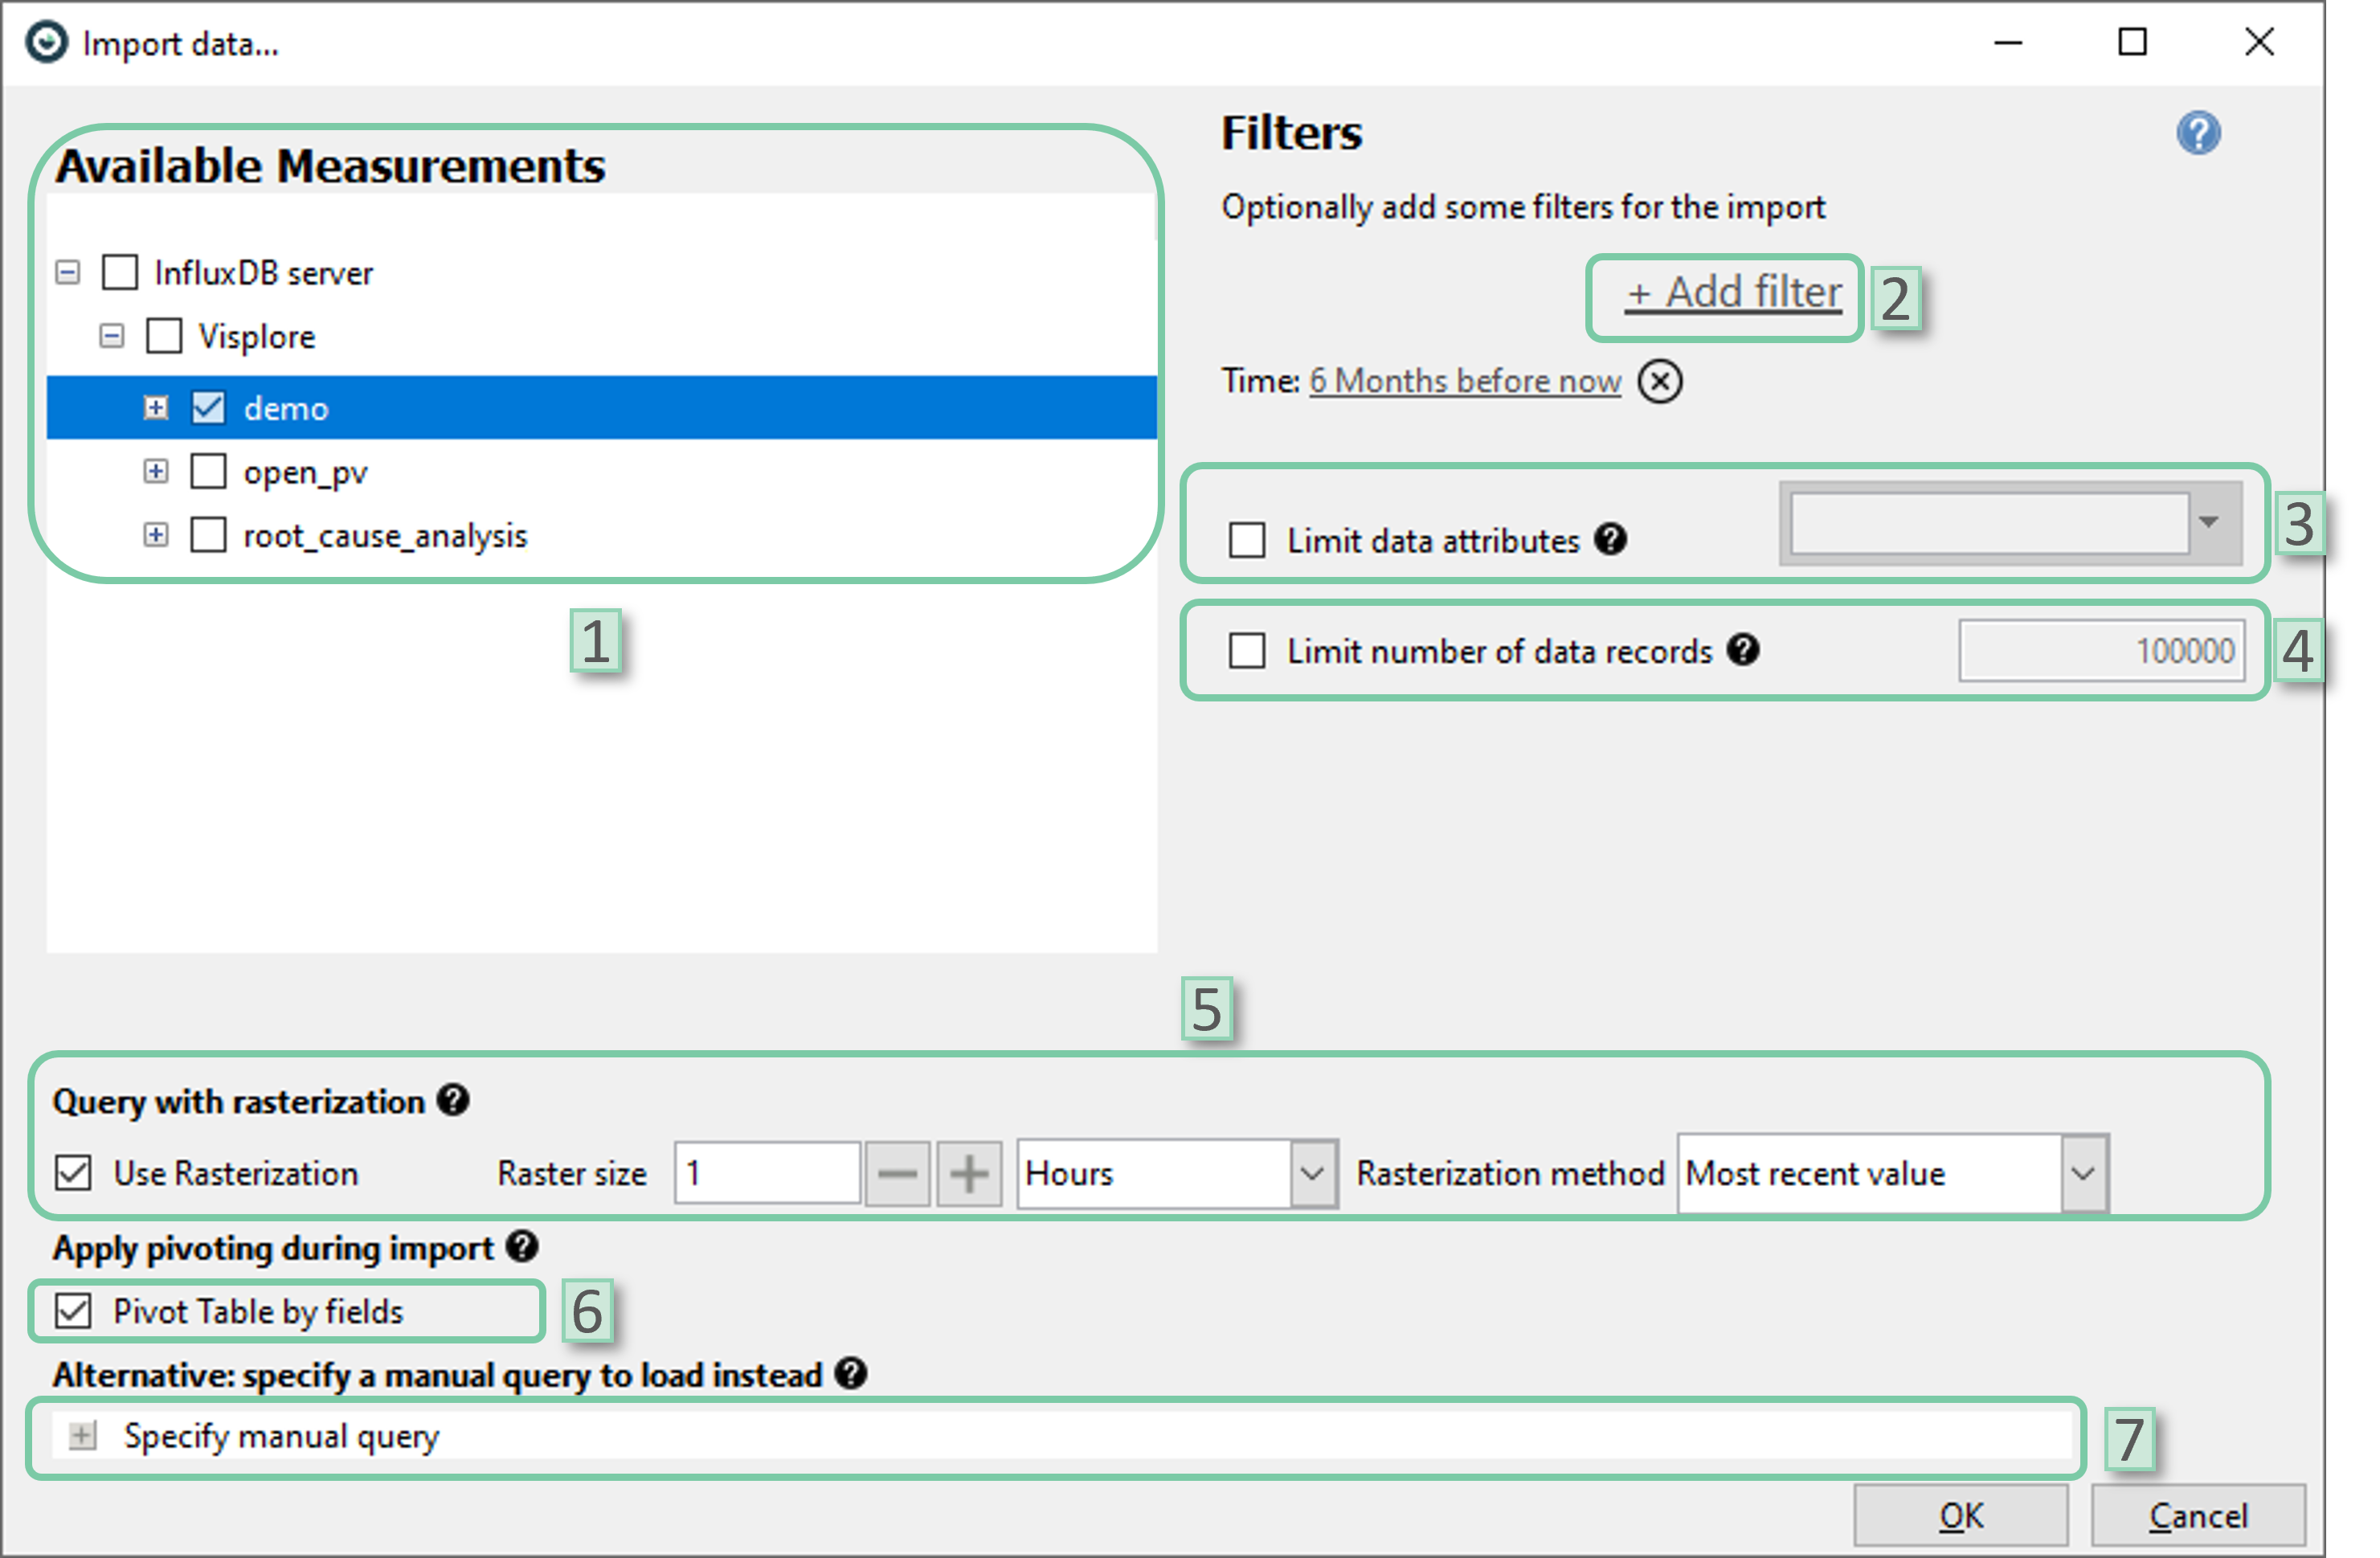
- 1. Select measurement: Select the measurements to be imported from the database
- 2. Add filter: Select filters to be added. Date/time attributes or categorical attributes could be selected. By default, time filter is set to ‘6 Months before now’. You can change the time-span by clicking onto it or remove the filter completely by clicking the ‘X’ icon next to it.
- 3. Limit data attributes: Limit data attributes to be included in the imported data.
- 4. Limit number of data records: Limit the maximum number of data records to be included in the imported data. It could be helpful for big datasets.
- 5. Query with rasterization: If desired, data can be rasterized even before importing it into Visplore. User can select the raster size (temporal resolution) and rasterization method. Note that, the rasterization methods ‘mean’ and ‘sum’ are only applicable if the dataset only holds numerical data attributes as these methods are not defined for categorical data attributes.
- 6. Pivot table by fields: This setting is ON by default and advised to be left as it is. Pivoting collects unique values stored vertically (column-wise) and aligns them horizontally (row-wise) into logical sets. This allows the data to be formatted in a tabular way that most users are used to. If this setting is unchecked, the selected fields must all be of type FLOAT.
- 7. Specify manual query: The user can apply custom import settings via a flux code. This automatically disregards any other import setting provided via the user interface.
After clicking ‘OK’ in the ‘Import data…’ window, depending on your data structure, ‘Asset/Variable structure definition’ window might pop-up.
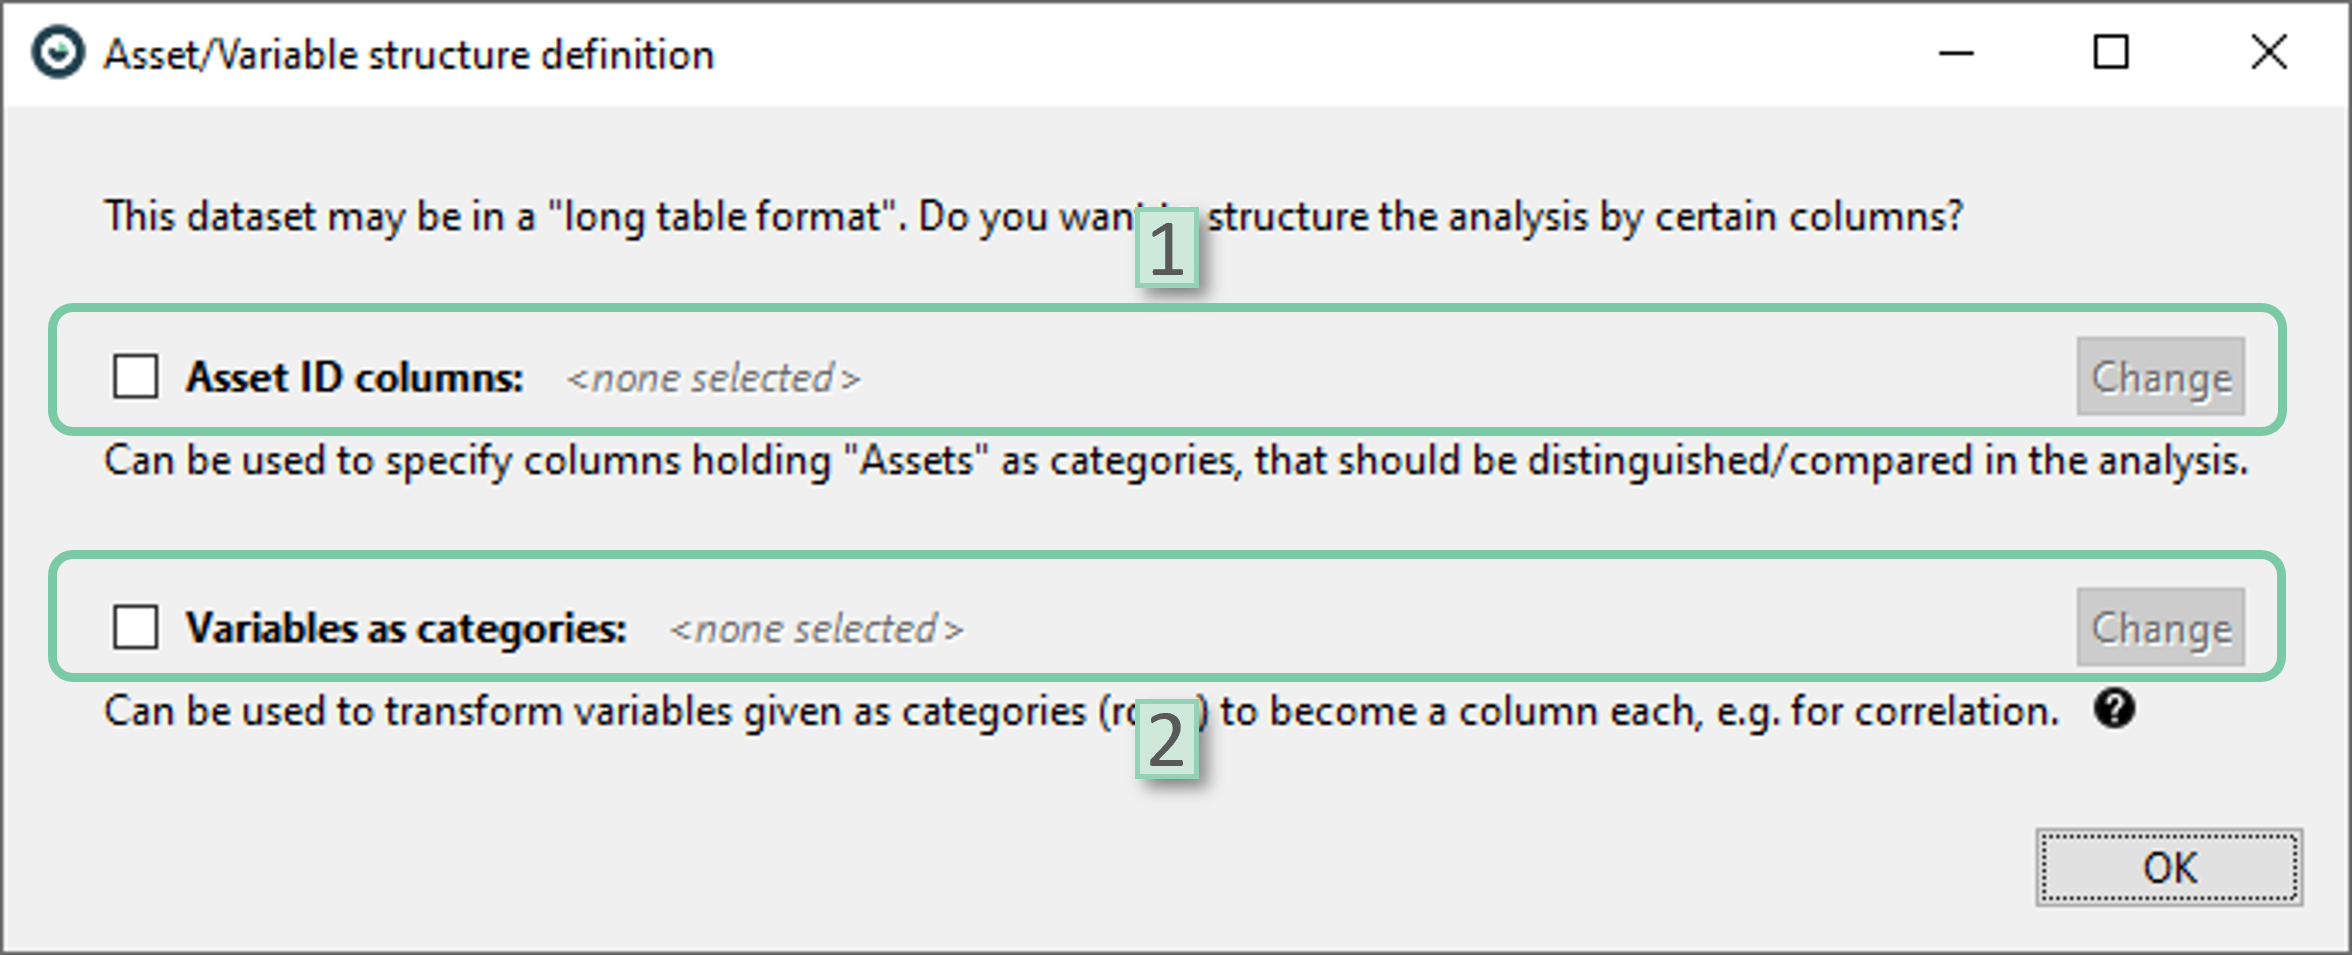
1. Asset ID columns: Select the attributes to be identified as asset IDs. Visplore might have made an automatic selection for you. You can also change this assignment by clicking the ‘Change’ button. This can also be set or changed after the import is completed.
2. Variables as categories: Select the attributes to be defines as key categories for a rows to columns transformation. This can also be set or changed after the import is completed.
Setting up additional connections and selecting among them
If you have already set up a connection and want to add an additional one or chose between the existing connections, please refer to this section.
1. Click the icon in the ‘Welcome’ dialog
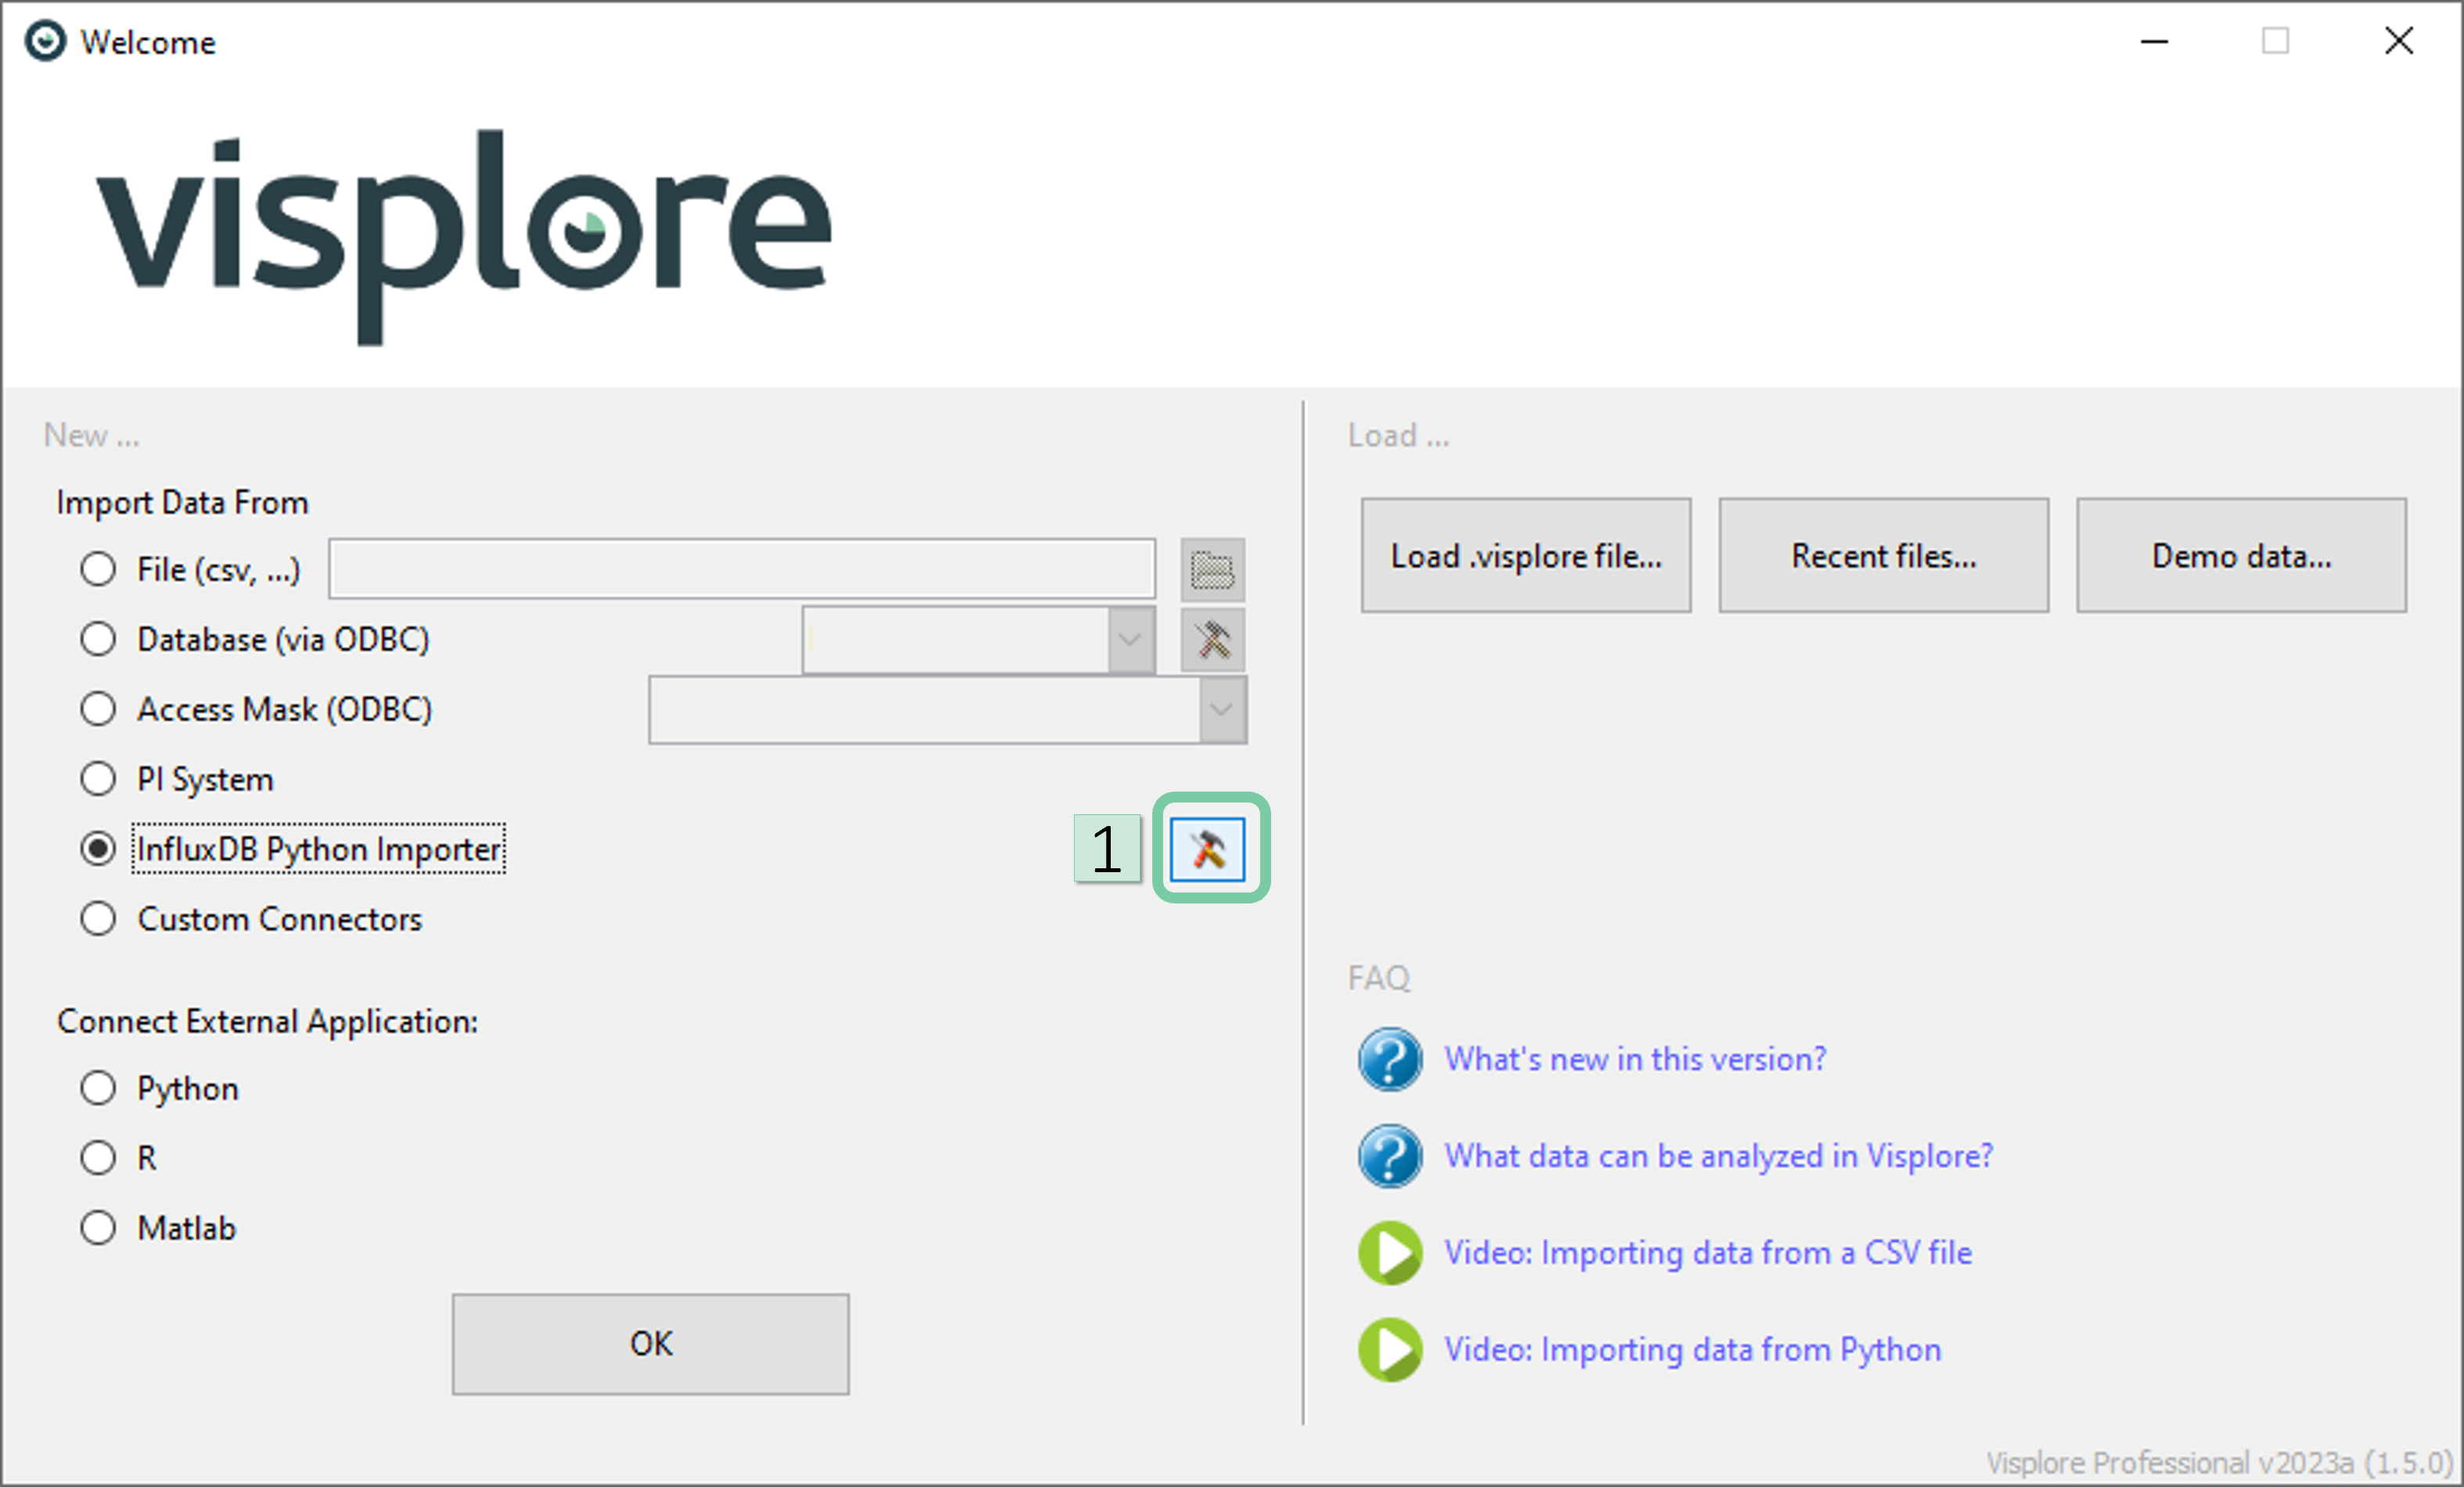
2. Once the ‘Select connection…’ window pops up, click the downwards pointing arrow.
3. Then, in that drop-down menu, you can select among the existing connection or opt for creating a new one.

