AVEVA Historian (Wonderware)
Pro This data connector is only available in Visplore Professional.
Visplore can connect to the AVEVA historian (formerly known as Wonderware) via ODBC. All you need is an ODBC driver and, ideally, an ODBC data source ("DSN") configured in Windows.
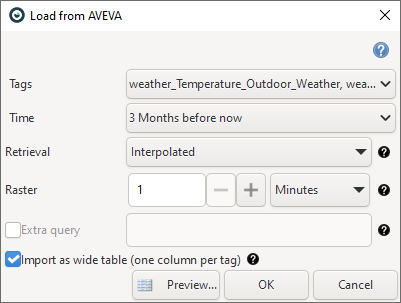
To further simplify the interaction with the historian, one can configure a so-called access mask for Visplore. This access mask results in a user-friendly dialog in Visplore, where the user can pick time ranges, select the tags, define the retrieval method and the raster, and write extra SQL queries if needed.

Requirements and Setup
Before defining an access mask, the ODBC source needs to be registered.
Start the "ODBC Data Source Administrator (64-bit)" in the Windows start menu by typing "odbcad".
Configure a user DSN ("data source name") by clicking "Add...".
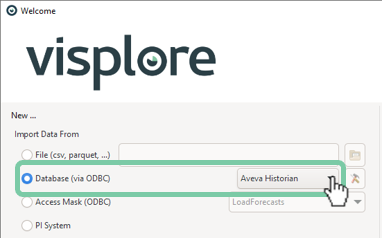
Once you configured your DSN, it appears as an option in the Welcome Dialog. Should you not see your DSN here, ensure that you used the 64-bit ODBC Data Source Administrator, as the 32-bit one does not show up in Visplore. Also, close (or restart) Visplore before the configuration of your DSN.

How to setup the XML configuration of access masks
The access mask is defined in an XML file. Use the following steps to create your custom access mask.
- Download the access mask XML configuration as a starting point.
- Save the XML reference file and place it in the correct location, as depending on your specific use case you have multiple options on where to put the XML access mask configuration. See Where to put ODBC access masks for details.
- Modify and extend the access mask XML configuration to your need using the documentation on the access mask syntax. We recommend using an editor with syntax highlighting such as Notepad++.
Important: Visplore must be restarted in order for it to detect the new access mask. Upon restarting, you see the new access mask in the welcome dialog. Depending on your DSN configuration you might be prompted for a username and password.

Import options

Tags
Select the tags whose data you wish to import. At least one tag must be chosen, and wide tables can accommodate up to 1024 tags. You can select tags of different types, and any combination will function. If string tags are selected in combination with a raster, AVEVA Historian will automatically determine the most appropriate value for each cycle based on the chosen retrieval method.
Time
Specify the time span for the retrieved data. The values entered and the time of retrieved data are in the local time of the server running AVEVA Historian. Internally, AVEVA processes all times in Coordinated Universal Time (UTC) and manages conversions in the background. By default, the retrieval time zone aligns with the AVEVA Historian server's settings, automatically adjusting for daylight saving time. Daylight saving time and time zone parameters are computed based on the server operating system settings.
To use locale times, you can utilize the 'Extra query' field of the access mask. Simply enter the desired time zone using the format: wwTimeZone="Time Zone Name". For instance, to query data in London time, you would enter wwTimeZone="W. Europe Standard Time".
Retrieval
Different retrieval modes in AVEVA Historian offer various ways to access stored data. For instance, when retrieving data over a long period, selecting a method that fetches only a few evenly spaced data points can minimize response time. Conversely, for shorter periods, retrieving more stored values can provide greater accuracy.
If you require raw, unaggregated data, choose the 'Raw Values' retrieval method. This option does not utilize raster settings.
Raster
The resolution parameter sets the sampling interval for data retrieval, determining the length of each cycle. For example, setting it to 10 minutes means retrieving a value every 10 minutes within the specified time span.
If relative time span 'from now' is chosen, the time span is adjusted slightly to produce timestamps that are more visually appealing. For instance, with a 10-minute resolution, timestamps would be generated as 15:10:00, 15:20:00, 15:30:00, etc., rather than 15:13:12, 15:23:12, 15:33:12, etc.
The number of cycles depends on both the time period and the resolution, calculated as: number of cycles = time period / resolution. However, the actual number of returned values may not always match this cycle count. In 'truly cyclic' modes like Interpolated, Average, and Integral, a single data point is returned for every cycle boundary. In other cycle-based modes such as Minimum and Maximum, the number of returned data points per cycle may vary based on the data nature.
The rowset ensures there is one row for each tag in the normalized query at every resolution interval, irrespective of whether a physical row exists in history at that precise moment. The value in each row represents the last known physical value in history for the relevant tag at that instant.
Extra query
The 'AND' string from the extra query field is prefixed to the text and appended to the 'WHERE' clause of the resulting SQL query. It's essential to note the formatting difference between the long table and wide table formats when specifying attribute values. In the wide table format, attribute values should be enclosed in double quotes, while in the long table format, they should be wrapped in single quotes.
For example, in wide table format: wwInterpolationType=”Linear”.
Import as wide table (one column per tag)
When checked, the table is imported in wide format, where each tag occupies its own column. Otherwise, the table is imported in long format.
